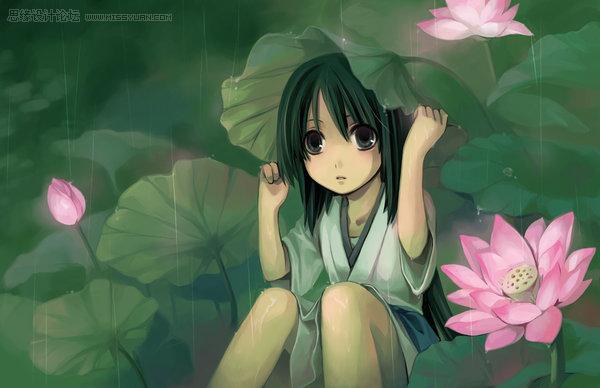
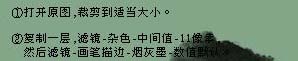
最终效果
![用ps制作非主流可爱签名档图 教程](http://img.lvups.com/d/file/bigpic/2022/12/25/nnzvfm1w5bn.jpg)
1、打开原图素材,裁剪到适当大小。
2、把背景图层复制一层,执行:滤镜 > 杂色 > 中间值,数值为11。确定后再执行:滤镜 > 画笔描边 > 烟灰墨,数值为默认。
![](http://img.lvups.com/d/file/bigpic/2022/12/25/mhitnnmxszr.jpg)
![](http://img.lvups.com/d/file/bigpic/2022/12/25/labt4inwono.jpg)
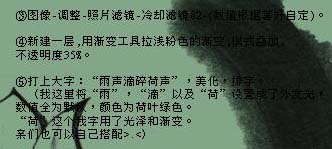
3、选择菜单:图像 > 调整 > 照片滤镜 > 冷却滤镜82(数值根据自己喜好设定)。
4、新建一层,用渐变工具拉浅粉色的渐变,然后把图层混合模式改为“叠加”,图层不透明度改为:35%。
5、打上自己喜欢的签名文字。
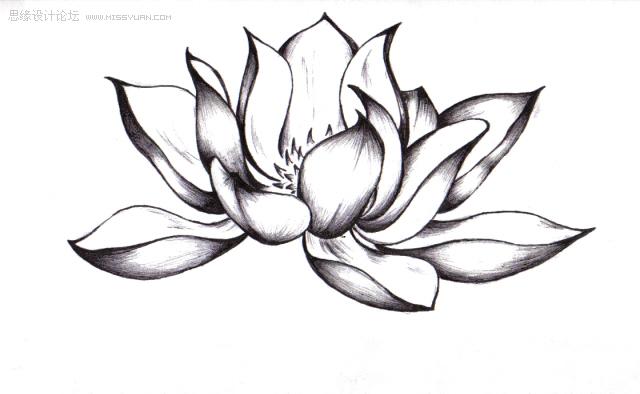
6、拖入荷花素材,图层混合模式改为“正片叠底”。
![](http://img.lvups.com/d/file/bigpic/2022/12/25/cv5bii5tbly.jpg)
![](http://img.lvups.com/d/file/bigpic/2022/12/25/vgpwl0v3ycu.jpg)
![](http://img.lvups.com/d/file/bigpic/2022/12/25/tfrgrnw3aox.jpg)
7、拖入高光素材,图层混合模式改为“滤色”,适当把背景图层锐化一下,完成最终效果。
![](http://img.lvups.com/d/file/bigpic/2022/12/25/fncu4nny0pd.jpg)
![](http://img.lvups.com/d/file/bigpic/2022/12/25/ltlrce3m22m.jpg)
![](http://img.lvups.com/d/file/bigpic/2022/12/25/nnzvfm1w5bn.jpg)