
近日有一些小伙伴咨询小编关于procreate怎么抠图呢?下面就为大家带来了procreate抠图的方法分享,有需要的小伙伴可以来了解了解哦。
procreate怎么抠图?procreate抠图的方法分享

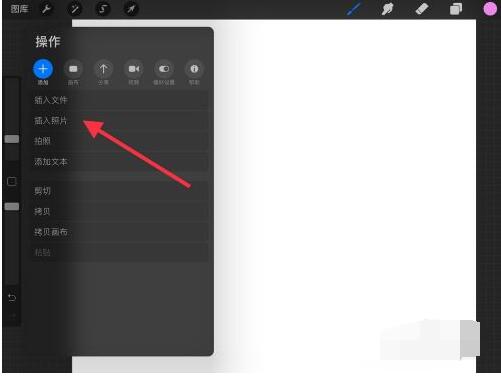
我们打开软件,点击操作--插入照片,然后选取需要抠图的照片导入进来;
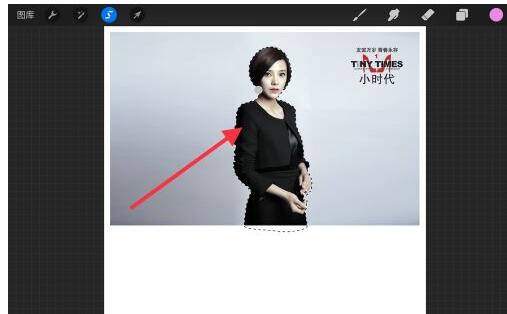
接着我们选择上方的S标记,下方选择手绘,然后将人物边缘画出来;
然后我们在下方选择添加;
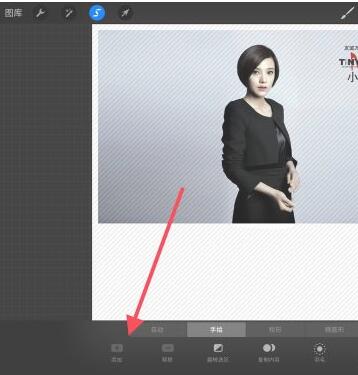
紧接着然后选择复制内容;
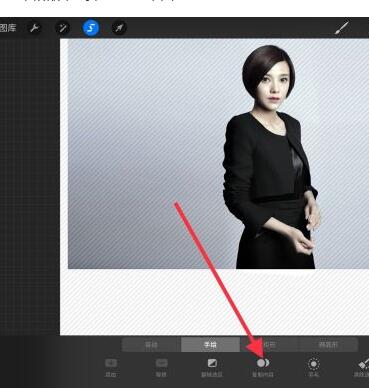
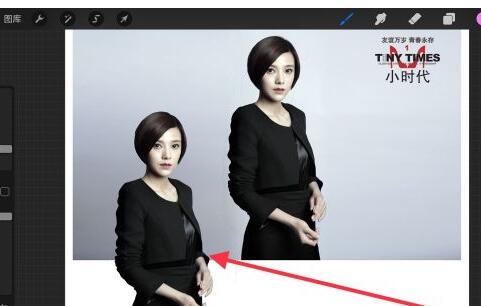
然后我们选择上方的箭头,也就是移动工具;

最后我们将人物移出来,就看到人物抠出来了。
以上这里为各位分享了procreate抠图的方法分享。有需要的朋友赶快来看看本篇文章吧!