
这种色调是我的一种风格,也是最拿手的调法。最基础本的调法。
原色调。非常时尚的哦。我自己给它命名为李心儿原色调。呵呵。希望大家喜欢。
1.本教程适合所有爱PS的朋友。
2.本教程所用的素材来自:网络。
3.本教程提供PSD源文件和原图片下载。
下载地址:https://img.lvups.com/d/file/bigpic/2022/12/25/li1jojvc3xq /> 4.本教程主要使用可选颜色工具。
5.我的博客地址:http://blog.163.com/lixiner5200/ 大家可以加我关注我哦。
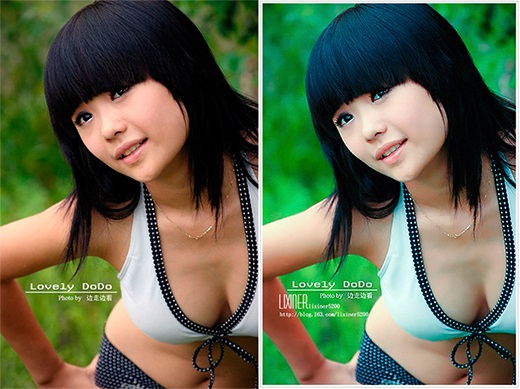
先看原图片和效果图片的对比吧:
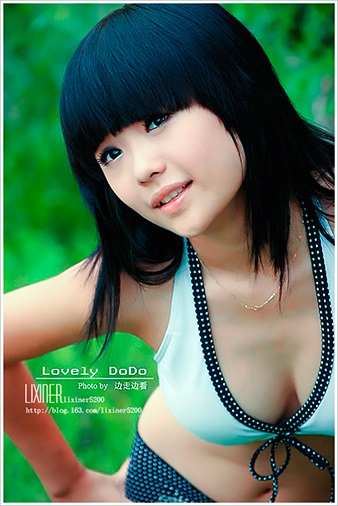
效果图片:
开始
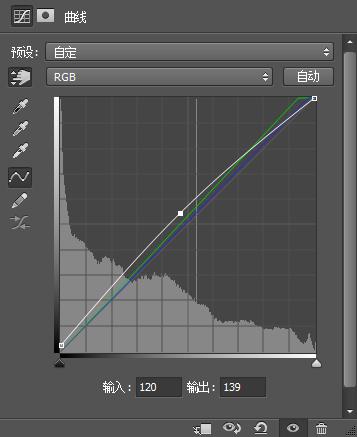
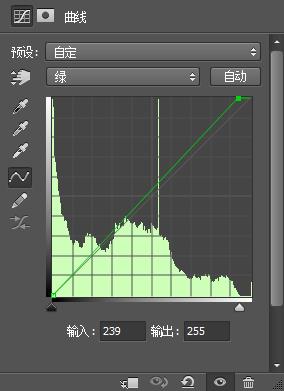
第一步:
调出色调来.用曲线吧。简单点。
大家看PSD源文件哦。曲线截图截不好哦。我是个笨笨的女子哦。
呵呵 。大家参考PSD源文件哦。
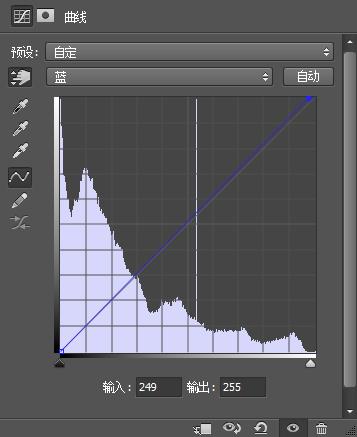
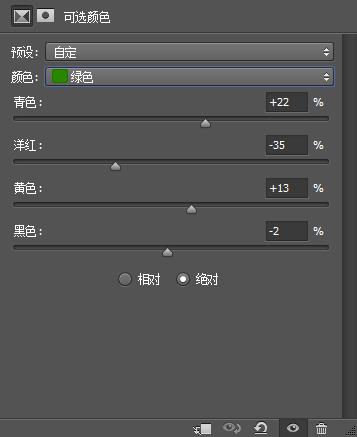
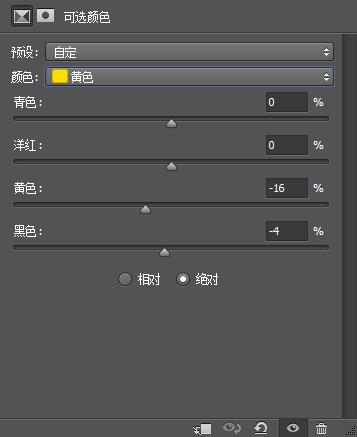
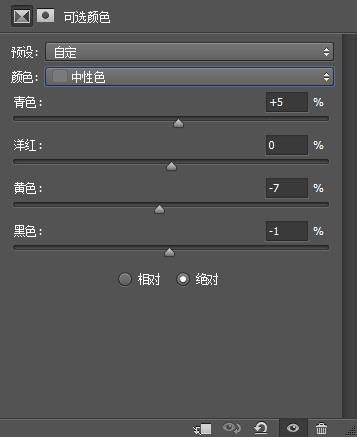
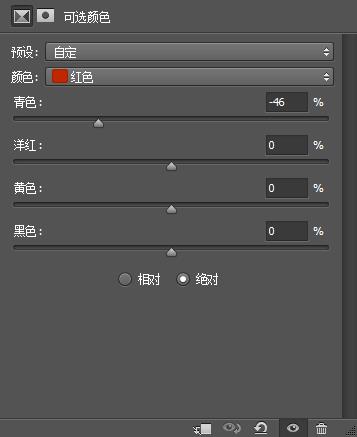
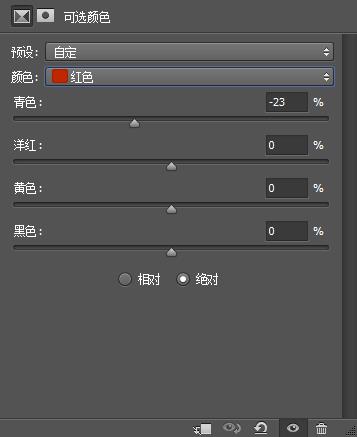
第二步:
还是调主色。把主色调出来。
使用可选颜色 工具。
 第三步:
第三步:
增加颜色。也是增强图片颜色
使用自然饱和度工具。

第四步:
主体图片增色调色。

 第五步:
第五步:
最后一步了,给图片盖印一层。做锐化。
这步很简单,大家自己锐化下图片就行了。
然后加上你的文字和给图片做边框就可以了。
好。这次的教程又结束了,希望你喜欢哦。
祝大家学习快乐。谢谢大家。
原色调。非常时尚的哦。我自己给它命名为李心儿原色调。呵呵。希望大家喜欢。
1.本教程适合所有爱PS的朋友。
2.本教程所用的素材来自:网络。
3.本教程提供PSD源文件和原图片下载。
下载地址:https://img.lvups.com/d/file/bigpic/2022/12/25/li1jojvc3xq /> 4.本教程主要使用可选颜色工具。
5.我的博客地址:http://blog.163.com/lixiner5200/ 大家可以加我关注我哦。
先看原图片和效果图片的对比吧:
效果图片:
开始
第一步:
调出色调来.用曲线吧。简单点。
大家看PSD源文件哦。曲线截图截不好哦。我是个笨笨的女子哦。
呵呵 。大家参考PSD源文件哦。
第二步:
还是调主色。把主色调出来。
使用可选颜色 工具。
第三步:增加颜色。也是增强图片颜色
使用自然饱和度工具。
第四步:
主体图片增色调色。
第五步:最后一步了,给图片盖印一层。做锐化。
这步很简单,大家自己锐化下图片就行了。
然后加上你的文字和给图片做边框就可以了。
好。这次的教程又结束了,希望你喜欢哦。
祝大家学习快乐。谢谢大家。


