
作者dowell 出处:23photoshop效果图
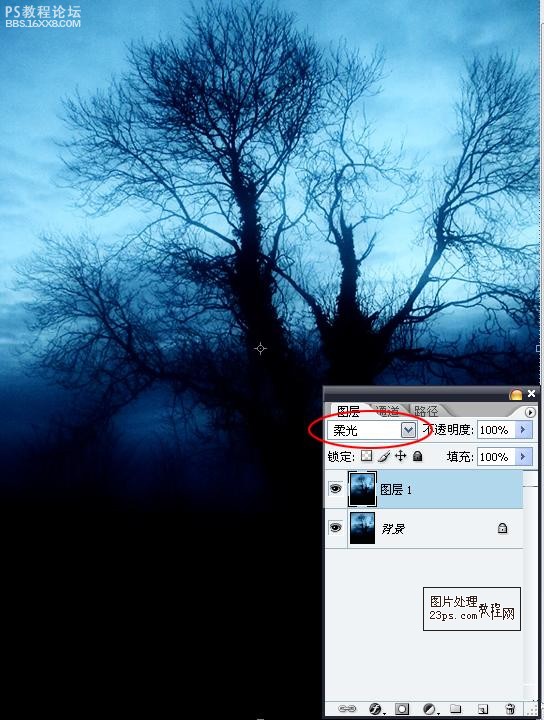
具体教程如下一 打开风景素材,复制图层,设为柔光混合模式。ctel+E合并图层
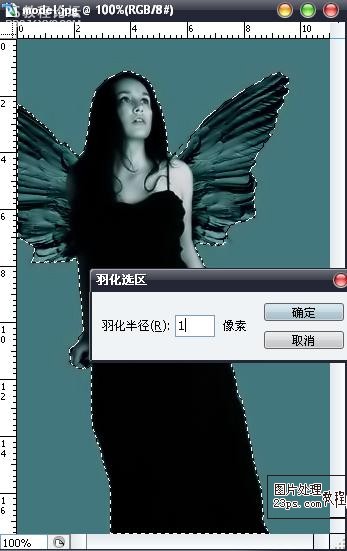
二 打开人物素材,直接用魔术棒选出人物,选择 修改 羽化 1像素左右
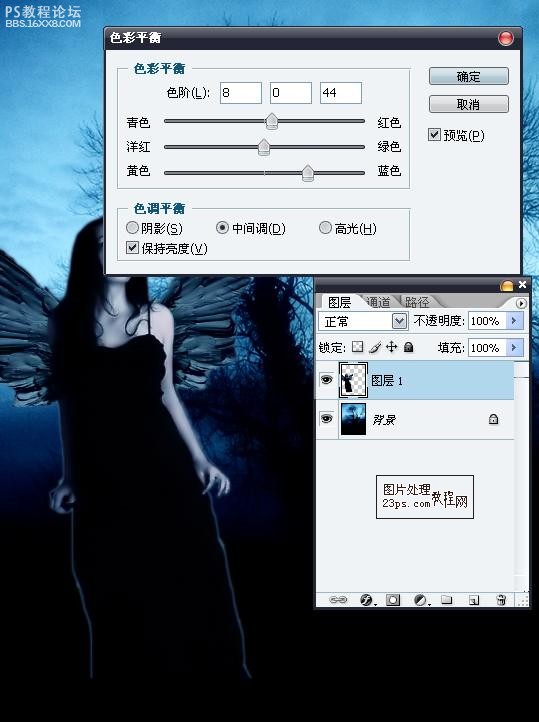
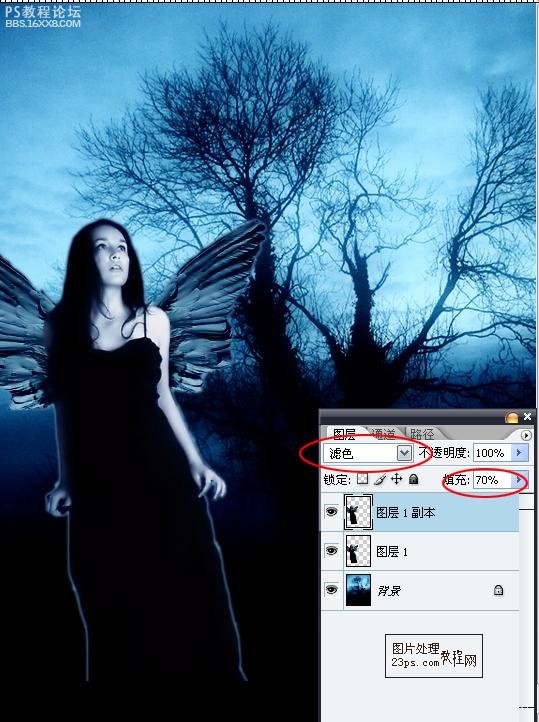
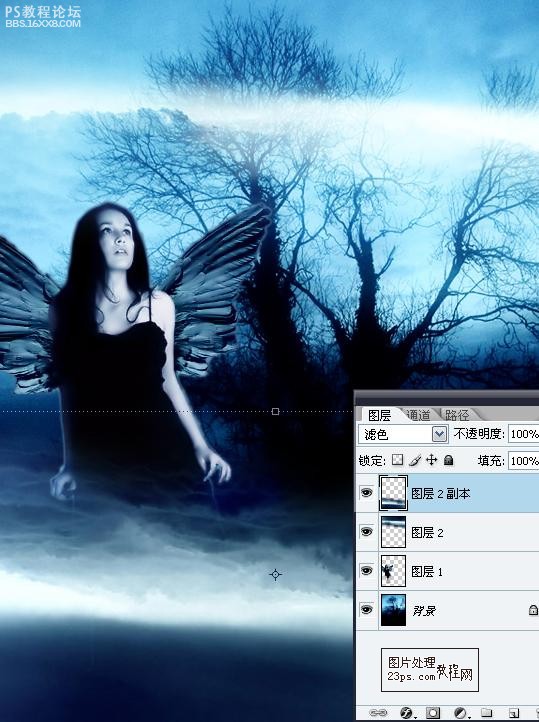
三 图像 调整 色彩平衡,设置如图,使人物与背景色彩协调。 然后复制人物图层,不透明度设为70%,改为“滤色”,ctrl+E合并人物图层
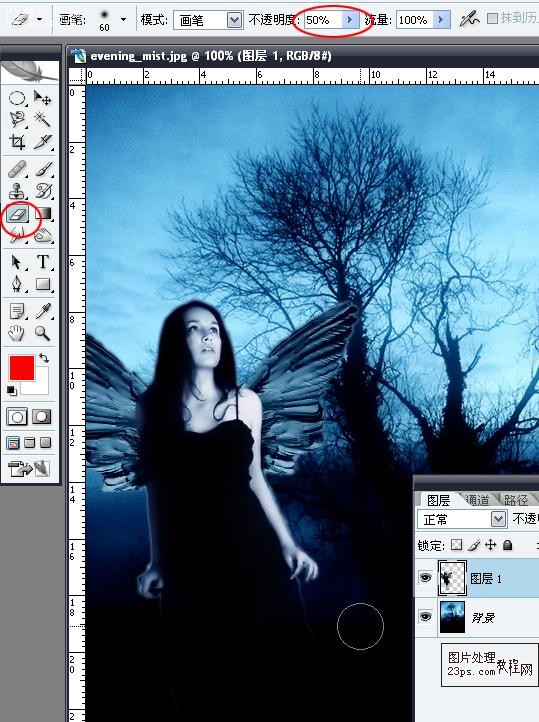
,四 使用橡皮擦工具擦去人物下部突出的部分(画笔硬度为0,不透明度50%)
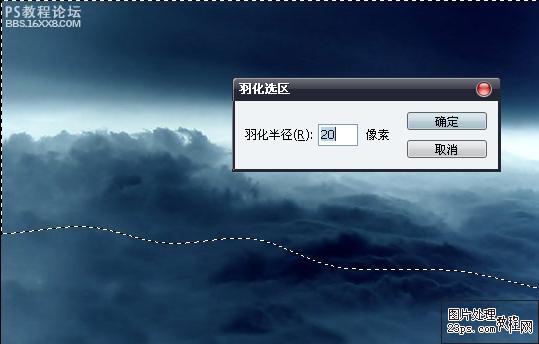
五 打开云彩素材,利用选区工具抠出一些区域,羽化20像素
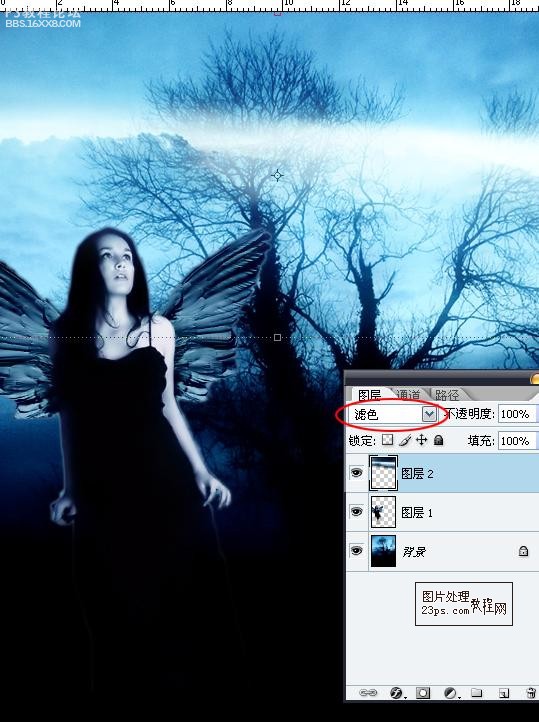
六 将云彩拖进来,云彩图层混合模式设为“滤色”
, 七 复制云彩图层,编辑——变换——垂直变换,放到图片的底部
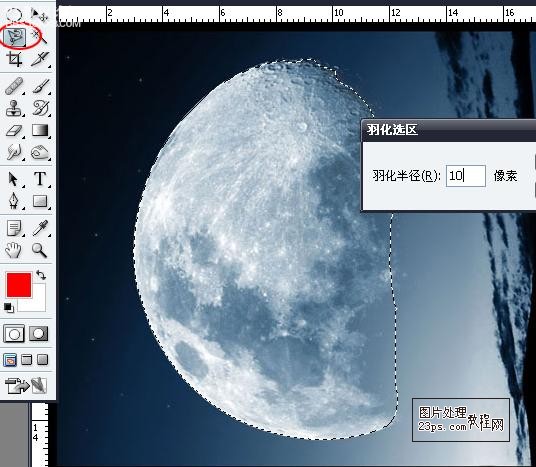
八 打开月亮素材,我直接用磁铁套索工具勾出月亮的轮廓,羽化10像素
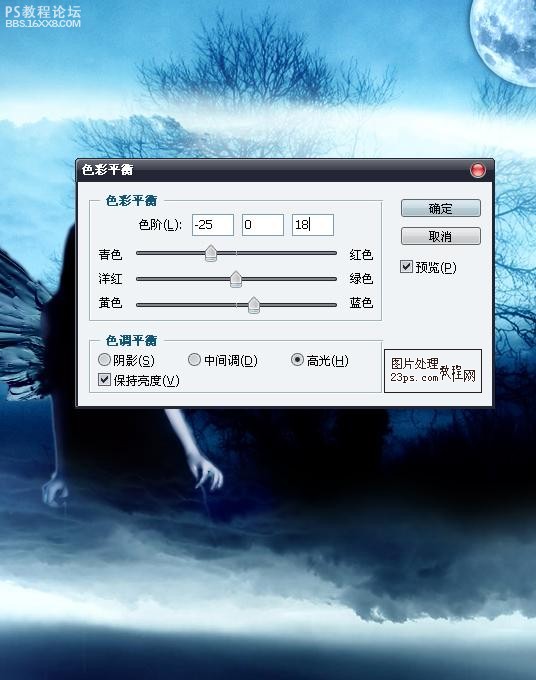
九 将月亮素材拖进去,图像 调整 色彩平衡,再改一下月亮图层不透明度
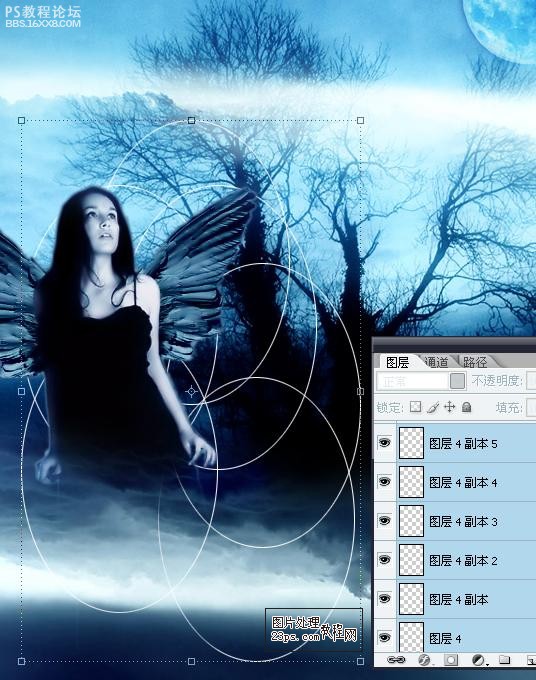
十 在人物图层下方新建一个图层,绘制一个椭圆选区,描边1像素,白色
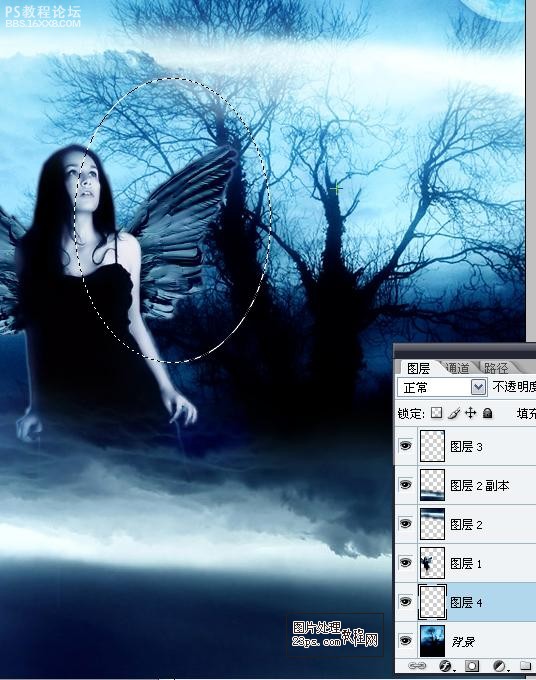
, 十一 ctrl+D取消选区,复制出几个图层,不规则排列,然后合并这几个椭圆图层 将这个图层命名为“线条”
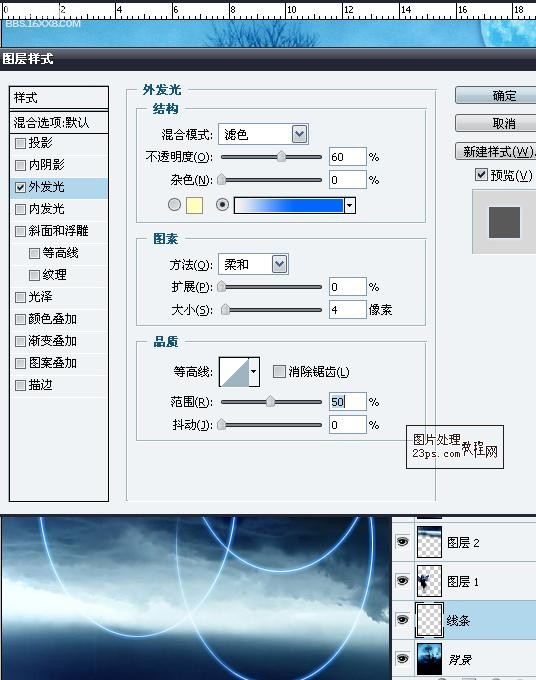
十二 双击线条图层,添加外发光样式,颜色选中“白至蓝色渐变”,其余参数见下图
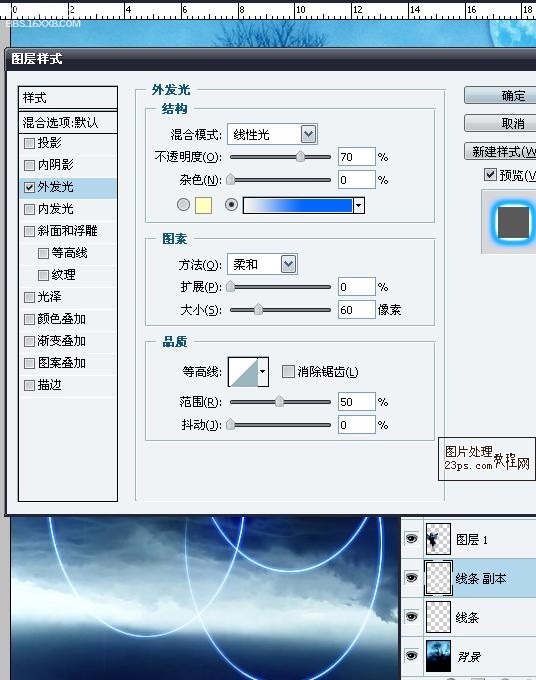
十三 复制线条图层,重新设定新图层的外发光样式
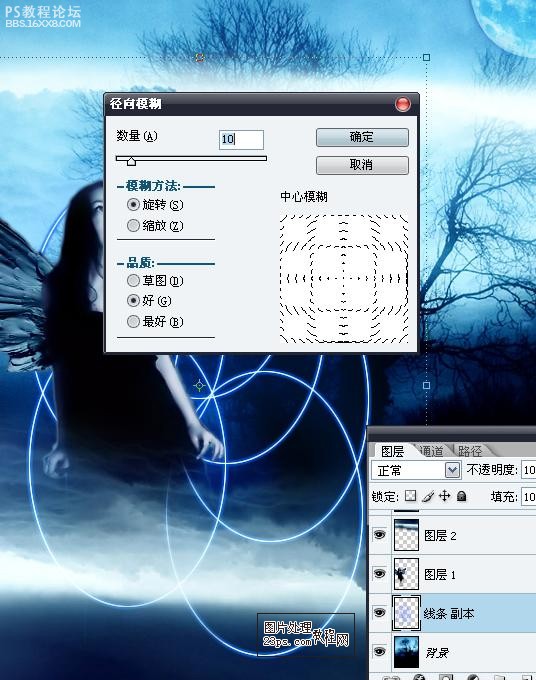
十四 合并这两个线条图层,滤镜-模糊-径向模糊,设置如下图
, 十五 将鸟素材拖进来 ctrl+t调整好大小与角度
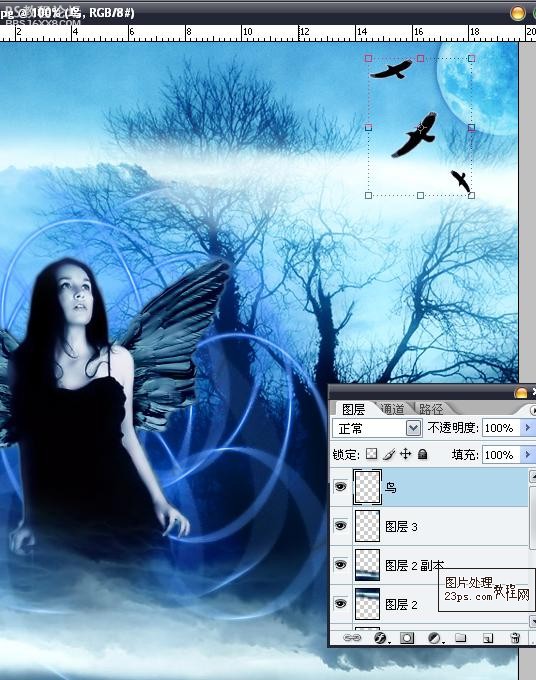
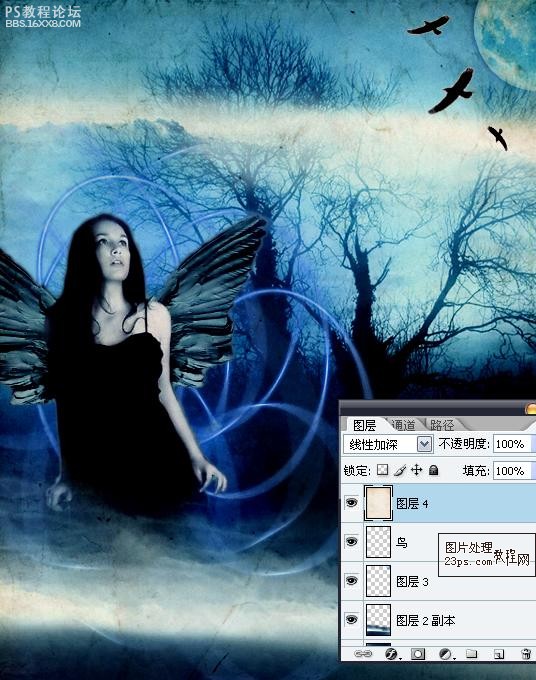
十六 最后将纸张素材拖进来,放至图层的最顶层,混合模式设为“线性加深”
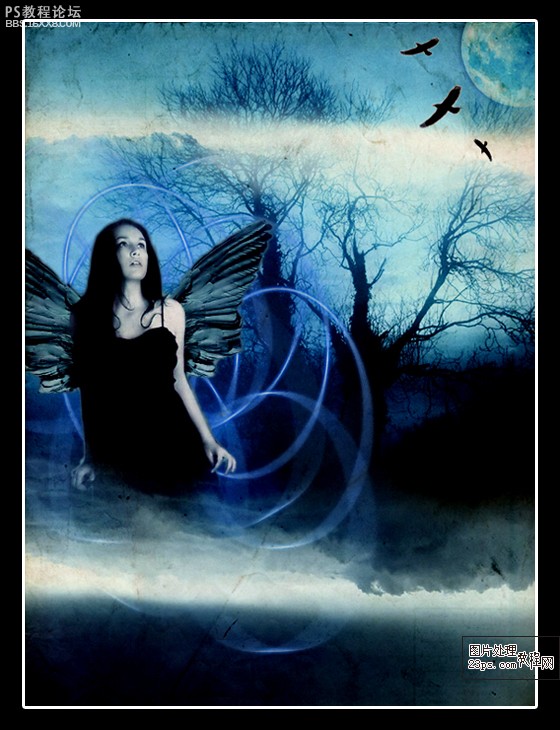
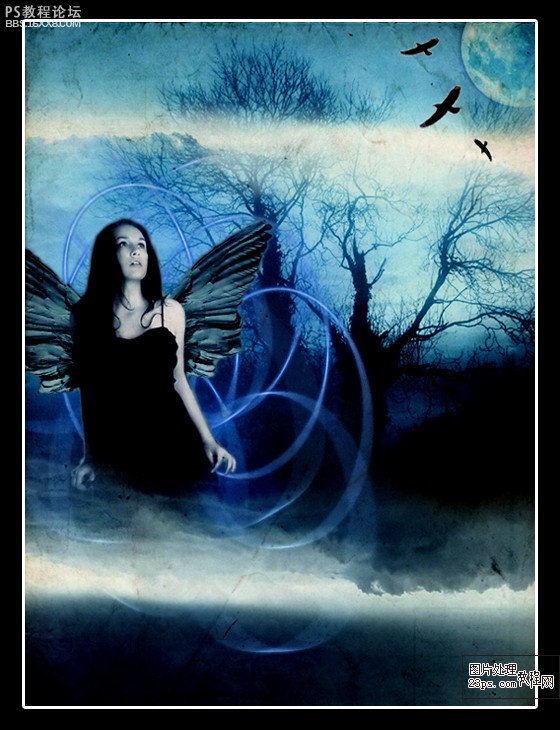
得出最终效果
具体教程如下一 打开风景素材,复制图层,设为柔光混合模式。ctel+E合并图层
二 打开人物素材,直接用魔术棒选出人物,选择 修改 羽化 1像素左右
三 图像 调整 色彩平衡,设置如图,使人物与背景色彩协调。 然后复制人物图层,不透明度设为70%,改为“滤色”,ctrl+E合并人物图层
,四 使用橡皮擦工具擦去人物下部突出的部分(画笔硬度为0,不透明度50%)
五 打开云彩素材,利用选区工具抠出一些区域,羽化20像素
六 将云彩拖进来,云彩图层混合模式设为“滤色”
, 七 复制云彩图层,编辑——变换——垂直变换,放到图片的底部
八 打开月亮素材,我直接用磁铁套索工具勾出月亮的轮廓,羽化10像素
九 将月亮素材拖进去,图像 调整 色彩平衡,再改一下月亮图层不透明度
十 在人物图层下方新建一个图层,绘制一个椭圆选区,描边1像素,白色
, 十一 ctrl+D取消选区,复制出几个图层,不规则排列,然后合并这几个椭圆图层 将这个图层命名为“线条”
十二 双击线条图层,添加外发光样式,颜色选中“白至蓝色渐变”,其余参数见下图
十三 复制线条图层,重新设定新图层的外发光样式
十四 合并这两个线条图层,滤镜-模糊-径向模糊,设置如下图
, 十五 将鸟素材拖进来 ctrl+t调整好大小与角度
十六 最后将纸张素材拖进来,放至图层的最顶层,混合模式设为“线性加深”
得出最终效果


