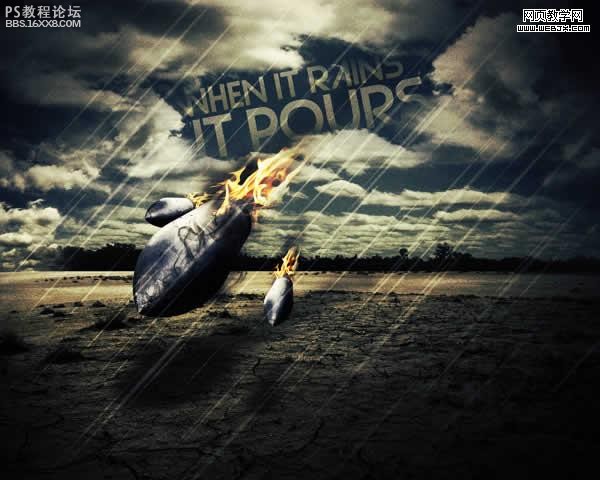
最终效果
![](https://img.lvups.com/d/file/bigpic/2022/12/26/aijyje4bdek.jpg)
所用素材:
![](https://img.lvups.com/d/file/bigpic/2022/12/26/gwriwkez0b0.jpg)
云的素材
![](https://img.lvups.com/d/file/bigpic/2022/12/26/2nnkc3esgab.jpg)
![](https://img.lvups.com/d/file/bigpic/2022/12/26/srv121blz2o.jpg)
,
![](https://img.lvups.com/d/file/bigpic/2022/12/26/eo1tojtjjdf.jpg)
![](https://img.lvups.com/d/file/bigpic/2022/12/26/0lnttr2ii0b.jpg)
![](https://img.lvups.com/d/file/bigpic/2022/12/26/bw03ixttzlr.jpg)
,新建立photoshop文档。
![](https://img.lvups.com/d/file/bigpic/2022/12/26/kra4mhnfnxv.jpg)
创建3个渐变调整图层。
![](https://img.lvups.com/d/file/bigpic/2022/12/26/h3ehquqmuvw.jpg)
新建立图层,填充为50%灰色,然后添加杂色,设置Amount: 400, Gaussian, Monochromatic,图层模式调整为叠加,不透明度调整到40%,效果如下。
![](https://img.lvups.com/d/file/bigpic/2022/12/26/jjvytxnezoy.jpg)
我们群组这些图层。
![](https://img.lvups.com/d/file/bigpic/2022/12/26/2vdvuqssvte.jpg)
,打开图片素材,按CTRL+T变形。
![](https://img.lvups.com/d/file/bigpic/2022/12/26/a34nrwt2n5i.jpg)
辅导线。
![](https://img.lvups.com/d/file/bigpic/2022/12/26/mwlqtffuexh.jpg)
继续调整。
![](https://img.lvups.com/d/file/bigpic/2022/12/26/k04h2i1bhir.jpg)
选区工具制作矩形选区。
![](https://img.lvups.com/d/file/bigpic/2022/12/26/bozwm3pckhw.jpg)
,用克隆图章工具,克隆天空使云彩不同。
![](https://img.lvups.com/d/file/bigpic/2022/12/26/snpsgyoulpr.jpg)
创建曲线调整层
![](https://img.lvups.com/d/file/bigpic/2022/12/26/wwng5oajfhj.jpg)
飞弹素材,然后打开选择飞弹。
![](https://img.lvups.com/d/file/bigpic/2022/12/26/ipqiwspdawy.jpg)
调整到合适大小和合适位置。
![](https://img.lvups.com/d/file/bigpic/2022/12/26/uais2spssoi.jpg)
,再次创建曲线调整图层
![](https://img.lvups.com/d/file/bigpic/2022/12/26/2c1agmtljpy.jpg)
同样再制作几个小的飞弹。
![](https://img.lvups.com/d/file/bigpic/2022/12/26/duqrotdhoai.jpg)
设置画笔。更多PS教程
![](https://img.lvups.com/d/file/bigpic/2022/12/26/rjleildbv2a.jpg)
把图层不透明度调整到70%,使用画笔绘制烟雾。
![](https://img.lvups.com/d/file/bigpic/2022/12/26/aktlmbvvxyy.jpg)
,复制烟雾图层,然后执行动感模糊。
![](https://img.lvups.com/d/file/bigpic/2022/12/26/lg41gosxbgv.jpg)
拼合烟雾图层
![](https://img.lvups.com/d/file/bigpic/2022/12/26/igpc4jkzbzj.jpg)
自由变换,然后把图透明度调整为50%,效果如下。
![](https://img.lvups.com/d/file/bigpic/2022/12/26/pqvt2nrub3x.jpg)
拼合在一起。
![](https://img.lvups.com/d/file/bigpic/2022/12/26/bbgi5v2fpom.jpg)
,小的飞弹制作烟雾特效。
![](https://img.lvups.com/d/file/bigpic/2022/12/26/xblbuzvpsi4.jpg)
添加调整图层,操作蒙板。
![](https://img.lvups.com/d/file/bigpic/2022/12/26/liypn5xjx2k.jpg)
打开两个云的图片素材,然后调整大小。
![](https://img.lvups.com/d/file/bigpic/2022/12/26/oqq2zvfo3ti.jpg)
添加几个调整层:色相/饱和度调整层、色彩平衡调整图层、曲线调整图层。
![](https://img.lvups.com/d/file/bigpic/2022/12/26/yagxopccgi1.jpg)
,复制刚才调整好的云图层,放到调整图层上面,调整位置,然后创建蒙板,使用画笔涂抹。
![](https://img.lvups.com/d/file/bigpic/2022/12/26/zyj1znuiygp.jpg)