
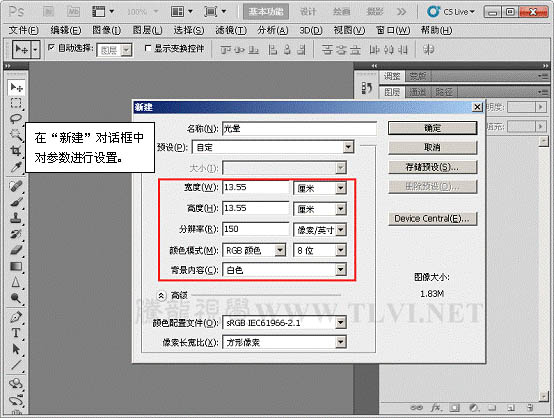
1、运行Photoshop,执行“文件”→“新建”命令,新建“光晕”文档。
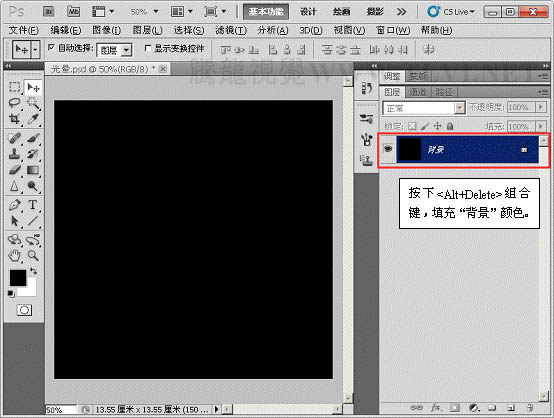
2、将“背景”图层填充为黑色。
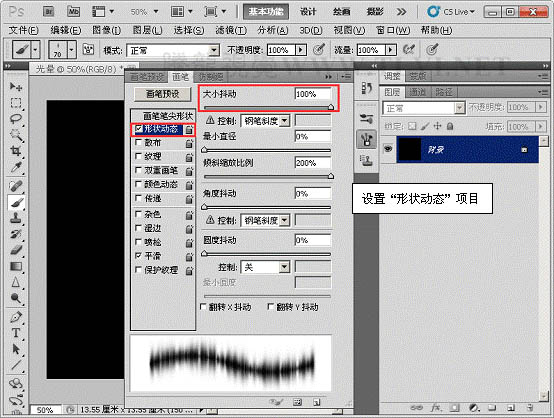
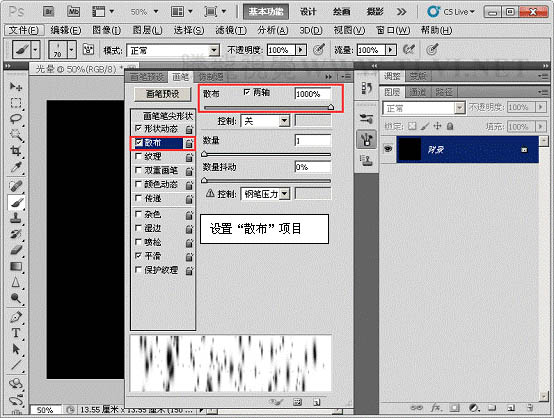
3、选择“画笔”工具,并对其运行设置。
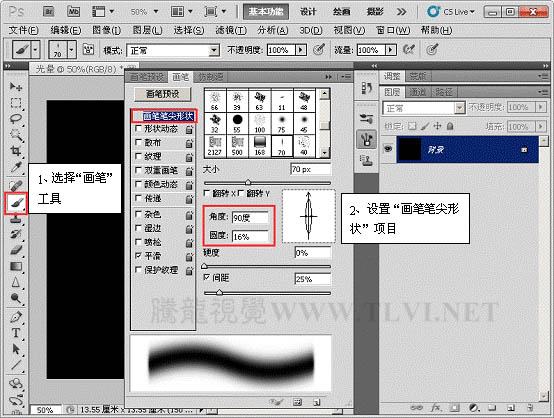
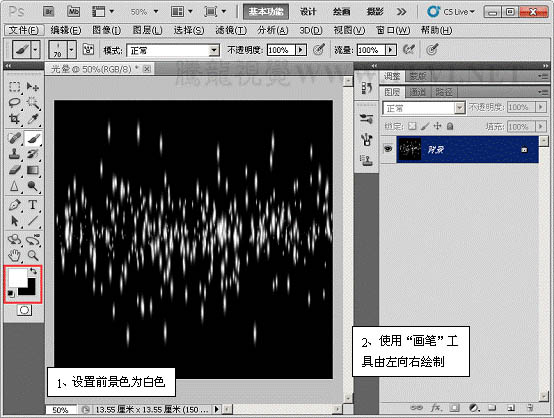
4、设置前景色,使用“画笔”工具运行绘制。
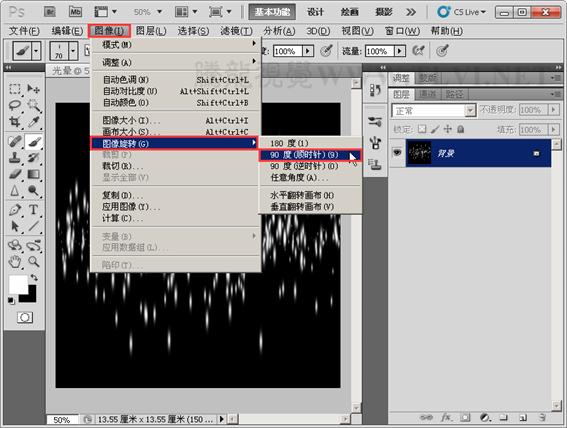
5、执行“图像”→“图像旋转”→“90度顺时针、”命令。
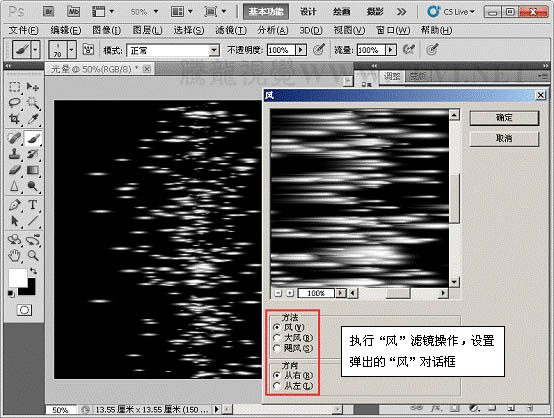
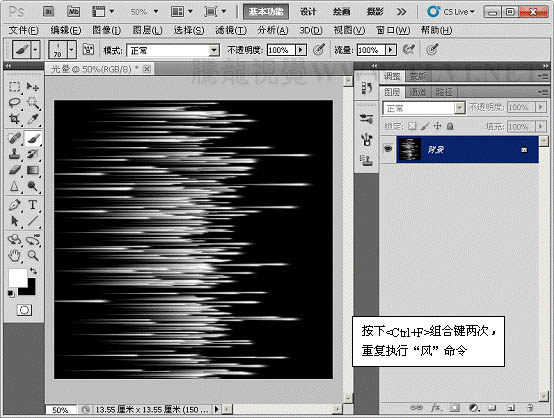
6、执行“滤镜”→“风格化”→“风”滤镜命令。
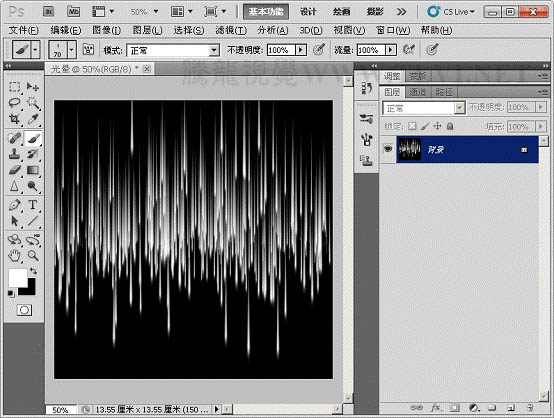
7、执行“图像”→“图像旋转”→“90度顺时针、”命令。
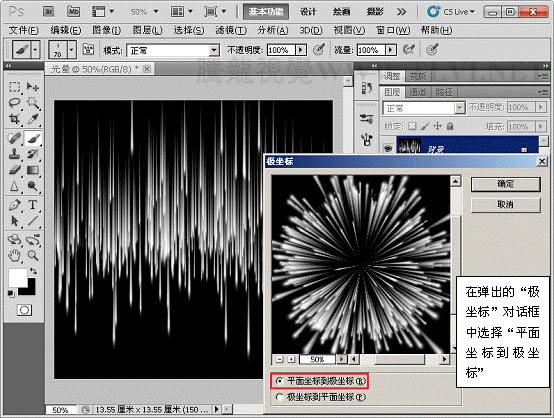
8、执行“滤镜”→“扭曲”→“极坐标”命令。
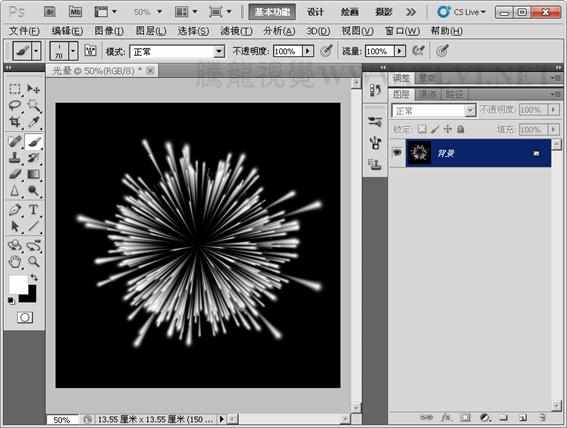
1、运行Photoshop,执行“文件”→“新建”命令,新建“光晕”文档。
2、将“背景”图层填充为黑色。
3、选择“画笔”工具,并对其运行设置。
4、设置前景色,使用“画笔”工具运行绘制。
5、执行“图像”→“图像旋转”→“90度顺时针、”命令。
6、执行“滤镜”→“风格化”→“风”滤镜命令。
7、执行“图像”→“图像旋转”→“90度顺时针、”命令。
8、执行“滤镜”→“扭曲”→“极坐标”命令。
上一篇:滤镜使用,线之绘滤镜使用方法教程
下一篇:第七课:初识时间轴


