![](https://www.16xx8.com/1linkpic/red.gif)
本教程多次用到极坐标,这款滤镜功能非常强大,可以很轻松把一些小图形处理成圆环形或放射效果。如果把一组用极坐标做好的图形组合起来,再渲染颜色,效果会更加绚丽多彩。
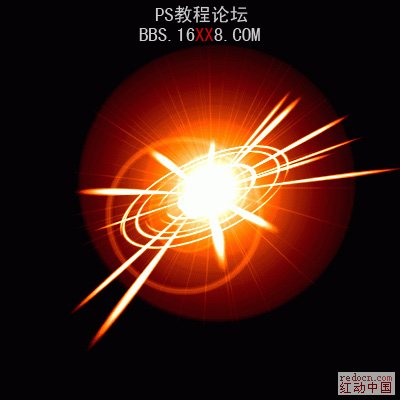
最终效果
![](https://img.lvups.com/d/file/bigpic/2022/12/25/ch1prausrjo.jpg)
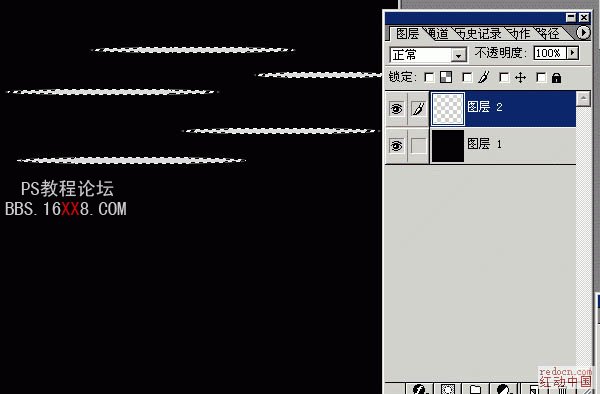
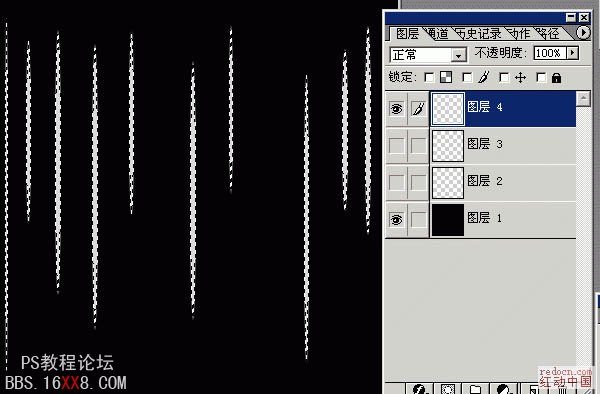
1、新建一个400X400px的图,将背景填成黑色。新建一个图层(图层 2)用椭圆选择工具作下图的选区,并填充亮灰色。
![](https://img.lvups.com/d/file/bigpic/2022/12/25/p22xpjsdzh5.jpg)
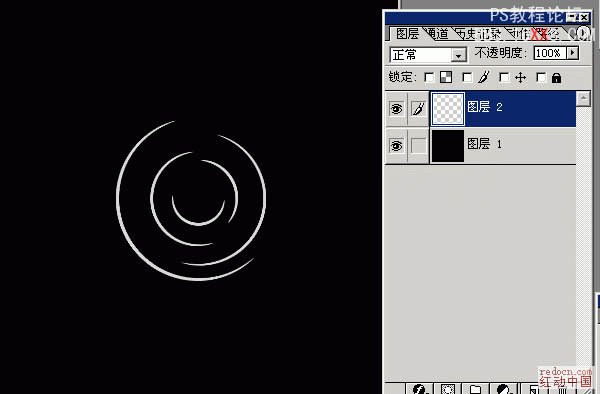
2、对图层 2 极坐标(滤镜/扭曲/极坐标,平面到极坐标)。
![](https://img.lvups.com/d/file/bigpic/2022/12/25/4sljzpl32zi.jpg)
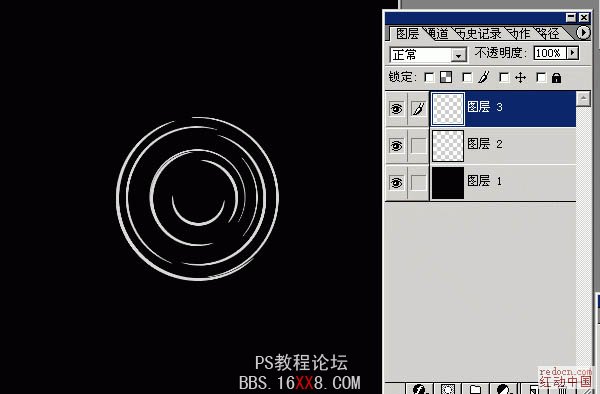
3、再建一个图层(图层 3),选区、填充、极坐标 (同上)。
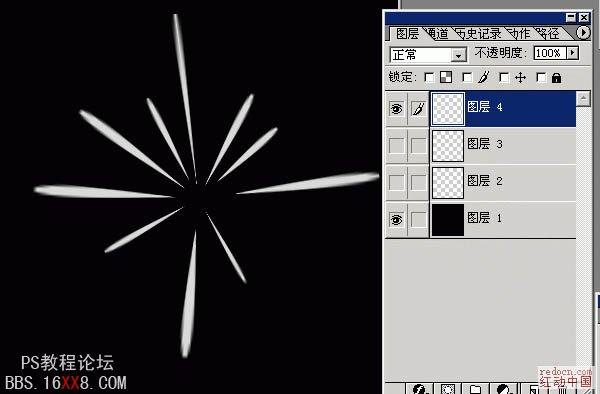
![](https://img.lvups.com/d/file/bigpic/2022/12/25/4pu1dl1vrvr.jpg)
4、这回做竖过来的椭圆。
![](https://img.lvups.com/d/file/bigpic/2022/12/25/scecosfw0my.jpg)
5、极坐标(同上) 我忘了说了,为了看得清楚我把图层2、3 改不可见了。
![](https://img.lvups.com/d/file/bigpic/2022/12/25/a4rlsqtshst.jpg)
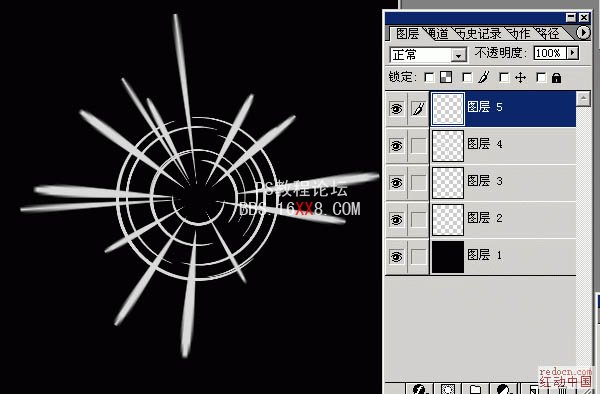
6、然后再新建一图层(图层 5)做一个竖椭圆,极坐标。把所有图层打开,效果就这样。
![](https://img.lvups.com/d/file/bigpic/2022/12/25/sseucdrpyfl.jpg)
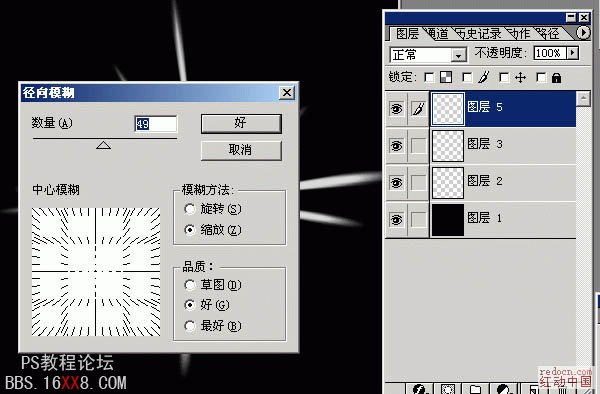
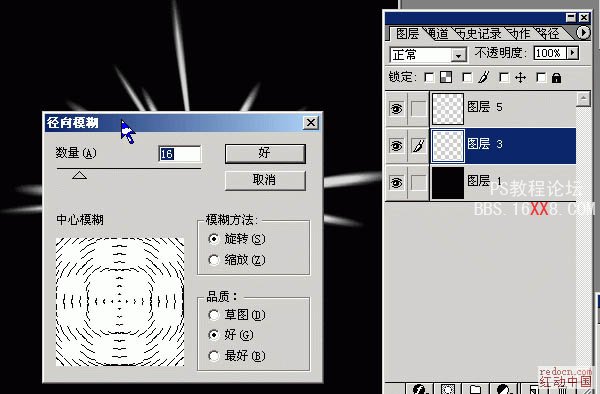
7、然后图层4、5合并(竖椭圆,向外散的那个),径向模糊(参数如图)。
![](https://img.lvups.com/d/file/bigpic/2022/12/25/ypxthl5h3ll.jpg)
8、图层2、3合并(横椭圆,开始做的那两个),径向模糊(参数如图)。
![](https://img.lvups.com/d/file/bigpic/2022/12/25/odrrysxsenw.jpg)
9、合并图层3、5(除了背景都合了),编辑/变换/扭曲,调成如图的样子。
![](https://img.lvups.com/d/file/bigpic/2022/12/25/j4kh5lfibns.jpg)
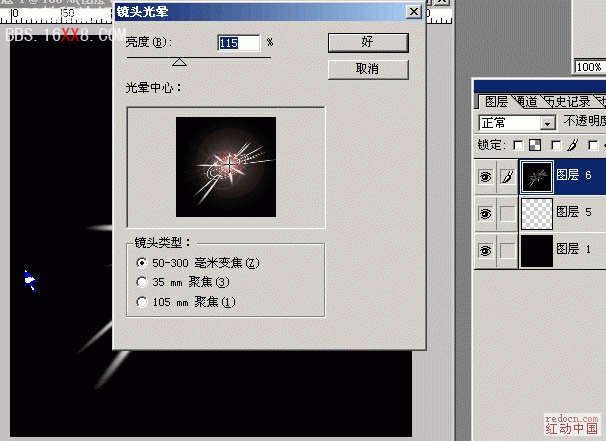
10、将变换完的图层放到中间,全选 合并拷贝 粘贴 (图层 6),对图层 6 做镜头光晕(滤镜/渲染/镜头光晕)将中。
![](https://img.lvups.com/d/file/bigpic/2022/12/25/l3mupwceykp.jpg)
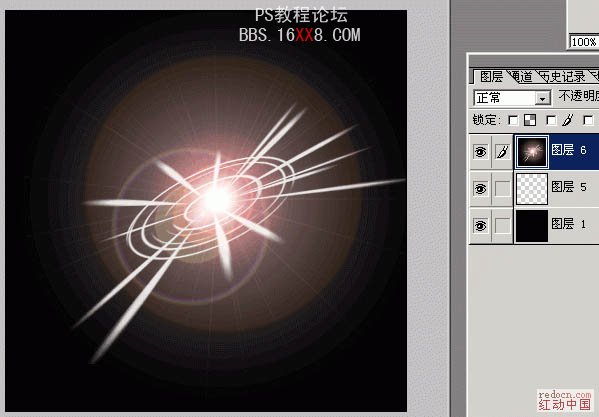
11、多做几次光晕,亮度低一点,达到类似这样。
![](https://img.lvups.com/d/file/bigpic/2022/12/25/t30rwyfietf.jpg)
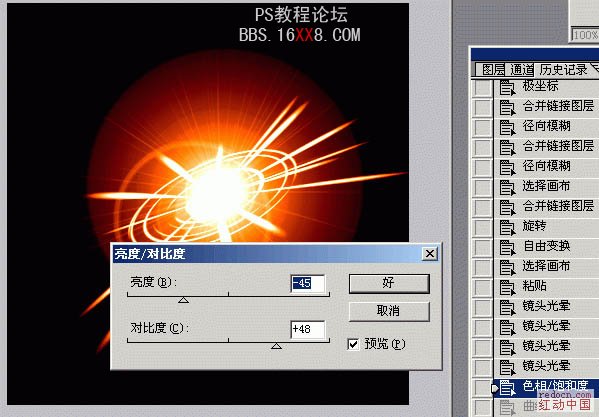
12、对图层 6做色相/饱和度(图像 / 调整 / 色相/饱和度),参数如下 (注意着色要选中)。
![](https://img.lvups.com/d/file/bigpic/2022/12/25/4o11niyyrim.jpg)
13、对图层 6做亮度/对比度(图像 / 调整 / 亮度/对比度),参数如下。
![](https://img.lvups.com/d/file/bigpic/2022/12/25/aarzcn4qwd5.jpg)
最终效果:
![](https://img.lvups.com/d/file/bigpic/2022/12/25/ch1prausrjo.jpg)