
photoshop图片处理教程:为MM加上鲜花翅膀作者:Sener 来源:PS联盟
本教程主要是利用花纹笔刷来制作翅膀的效果,制作过程中需要大量的笔刷。
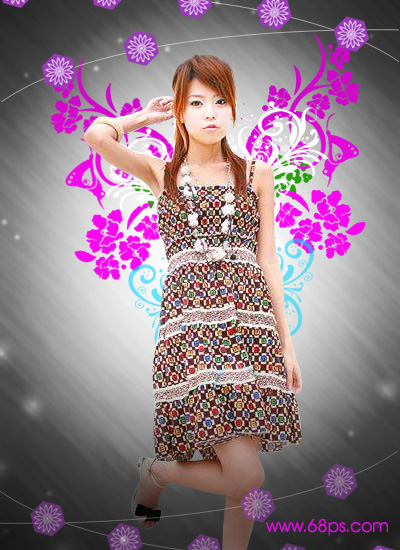
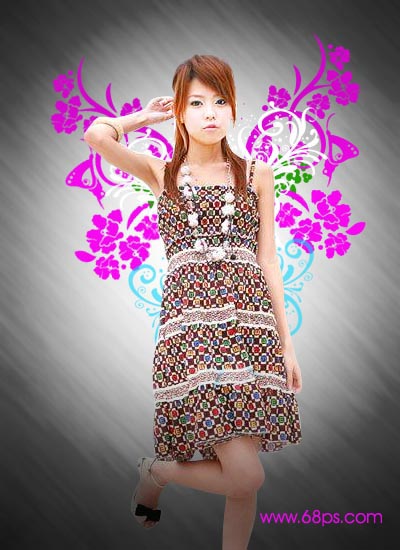
最终效果
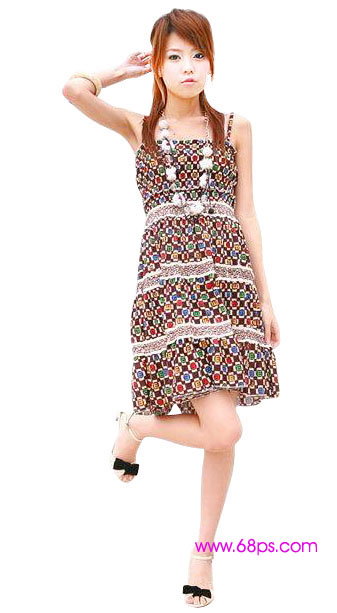
人物素材
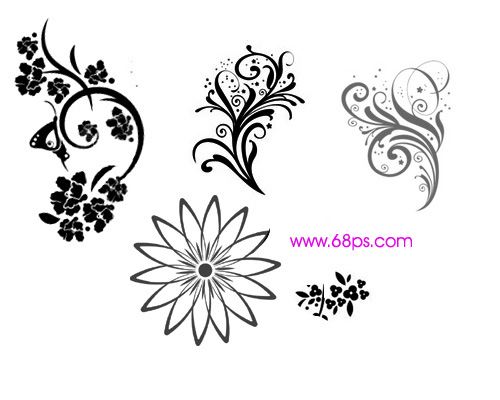
花纹素材
1.新建一个400px * 550px的文件,选择渐变工具,颜色设置为黑白渐变,渐变方式为径向渐变绘制图1所示的渐变。

<图1>
2.选择菜单:滤镜 > 杂色 > 添加杂色 参数设置如图2,
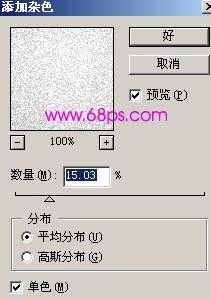
<图2>
确定后再执行:滤镜 > 画笔描边 > 成角线条 参数设置如图3,
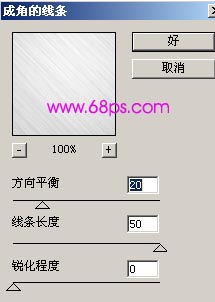
<图3>
效果如图4

<图4>
3.新建一个图层,用椭圆选框工具绘制图5所示的选区,
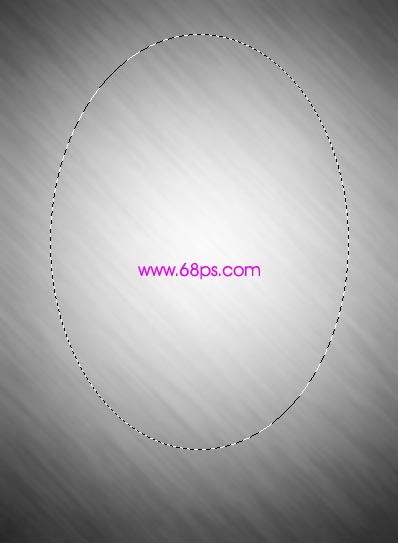
<图5>
然后按Ctrl Shift D 羽化数值为45,然后填充白色效果如图6
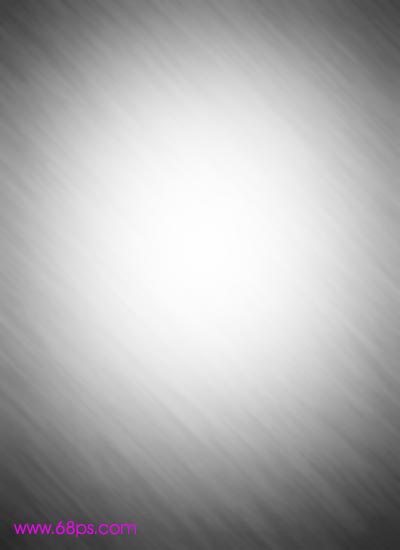
<图6>
4.合并所有图层按Ctrl M 适当调暗3一点效果如图7

<图7>
5.把人物素材打开,把人物勾出来适当的磨一下皮,然后拖进来效果如图8

<图8>
6.把花纹素材用魔术棒勾出来,然后添好颜色拖进来,放好位置,有的对称的就需要水平翻转一下。总体效果如图9。
<图9> 7.新建一个图层用画笔工具刷上一下小点点缀效果如图10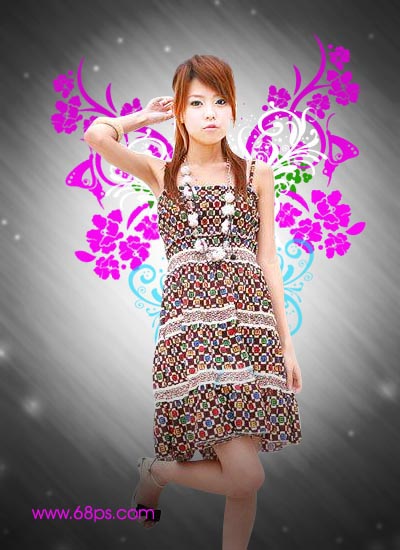
<图10> 8.最后加上一些花纹装饰完成最终效果。
<图11>
本教程主要是利用花纹笔刷来制作翅膀的效果,制作过程中需要大量的笔刷。
最终效果
人物素材
花纹素材
1.新建一个400px * 550px的文件,选择渐变工具,颜色设置为黑白渐变,渐变方式为径向渐变绘制图1所示的渐变。
<图1>
2.选择菜单:滤镜 > 杂色 > 添加杂色 参数设置如图2,
<图2>
确定后再执行:滤镜 > 画笔描边 > 成角线条 参数设置如图3,
<图3>
效果如图4
<图4>
3.新建一个图层,用椭圆选框工具绘制图5所示的选区,
<图5>
然后按Ctrl Shift D 羽化数值为45,然后填充白色效果如图6
<图6>
4.合并所有图层按Ctrl M 适当调暗3一点效果如图7
<图7>
5.把人物素材打开,把人物勾出来适当的磨一下皮,然后拖进来效果如图8
<图8>
6.把花纹素材用魔术棒勾出来,然后添好颜色拖进来,放好位置,有的对称的就需要水平翻转一下。总体效果如图9。
<图9> 7.新建一个图层用画笔工具刷上一下小点点缀效果如图10
<图10> 8.最后加上一些花纹装饰完成最终效果。
<图11>


