
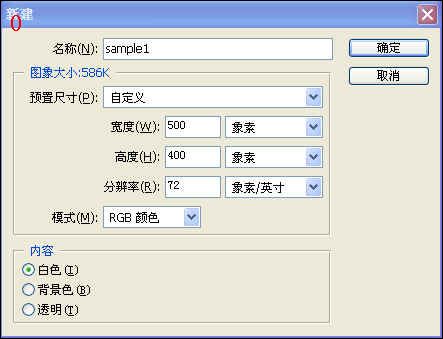
Photoshop制作光照效果1.最终效果图如下 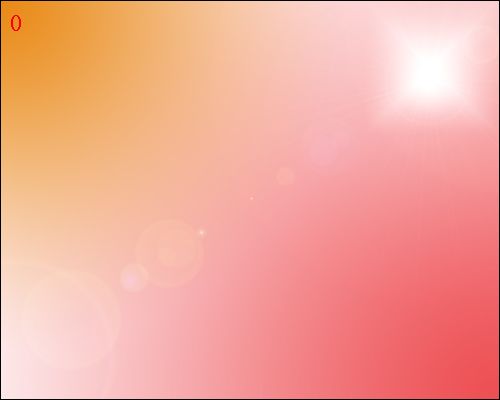 2.新建文件,文件大小自定,这里我自定的大小为500X400的,背景色为白色
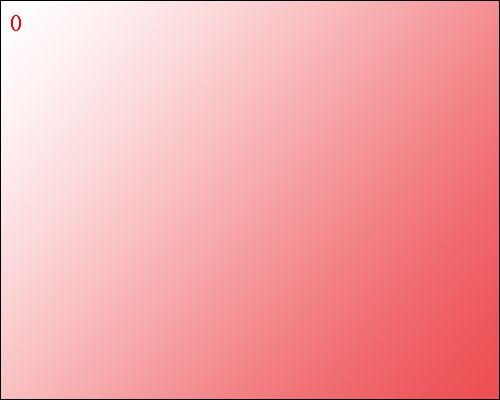
 3.使用渐变工具进行填充,具体的设置如下(红色的色值为#ED4E53)
 4.由右下向左上拖动,得到的效果如下所示。
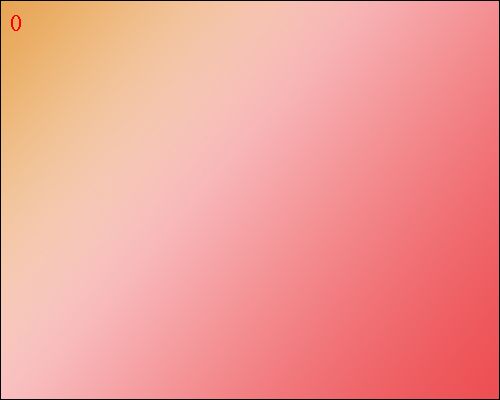
 5.再次使用渐变工具,设置如下图所示。(颜色色值为#E8A453)
 6.由左上往中间拖动,得到如下的效果图:
 7.再次使用渐变工具,设置星形渐变,具体设置如下:(白色的色值为#FFFFFF)
 8在右上位置拖动,(具体效果可以多拖动几次,直到得到最佳效果:
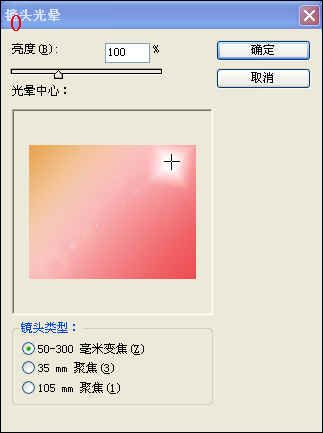
 9,有点感觉了吧!继续,执行滤镜/渲染/镜头光晕 相关设置如下
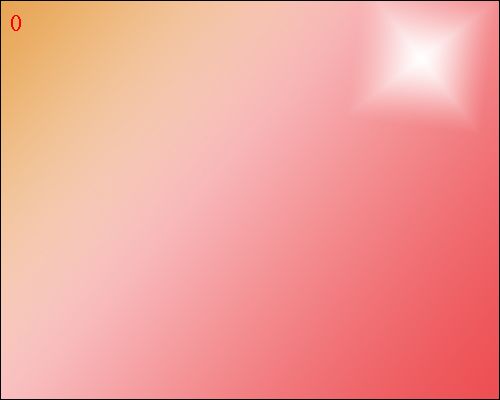
 10.注意将你的镜头放在最亮的地方,最终得到效果图
2.新建文件,文件大小自定,这里我自定的大小为500X400的,背景色为白色 3.使用渐变工具进行填充,具体的设置如下(红色的色值为#ED4E53) 4.由右下向左上拖动,得到的效果如下所示。 5.再次使用渐变工具,设置如下图所示。(颜色色值为#E8A453) 6.由左上往中间拖动,得到如下的效果图: 7.再次使用渐变工具,设置星形渐变,具体设置如下:(白色的色值为#FFFFFF) 8在右上位置拖动,(具体效果可以多拖动几次,直到得到最佳效果: 9,有点感觉了吧!继续,执行滤镜/渲染/镜头光晕 相关设置如下 10.注意将你的镜头放在最亮的地方,最终得到效果图搜索更多相关主题的帖子:Photoshop 效果 光照 制作 拖动
简单的,我们教你,深奥的,你来分享


