
利用PhotoShop制作水面材质
本则教程中我们将学习如何利用PS制作水面材质。

创建300x300画布并用黑色填充。
创建新的图层并命名为“水面”,用黑色填充该层。


将白色设为前景色,黑色设为背景色。


滤镜 >> 素描 >> 铬黄。
细节:10
平滑度:7

消退(CTRL SHIFT F)。
不透明度:50%
模式:正常
再次应用铬黄滤镜(CTRL F),并消退(CTRL SHIFT F)。
不透明度:30%
模式:正常

![]()
本则教程中我们将学习如何利用PS制作水面材质。
创建300x300画布并用黑色填充。
创建新的图层并命名为“水面”,用黑色填充该层。
将白色设为前景色,黑色设为背景色。
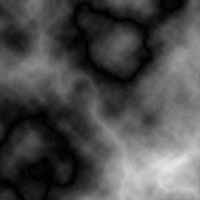
滤镜 >> 渲染 >> 分层云彩。
按下CTRL F两次,应用分层云彩滤镜三次。
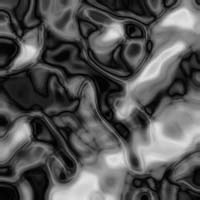
滤镜 >> 素描 >> 铬黄。
细节:10
平滑度:7
消退(CTRL SHIFT F)。
不透明度:50%
模式:正常
再次应用铬黄滤镜(CTRL F),并消退(CTRL SHIFT F)。
不透明度:30%
模式:正常
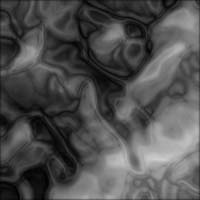
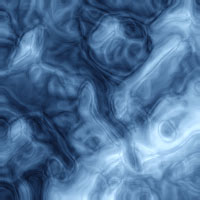
图像 >> 调整 >> 色彩平衡。
色阶:-50 0 50
色调平衡:中间调
图像 >> 调整 >> 亮度/对比度。
亮度: 25
对比度: 25

