
(8)执行“图像”→“调整”→“色相/饱和度”命令。

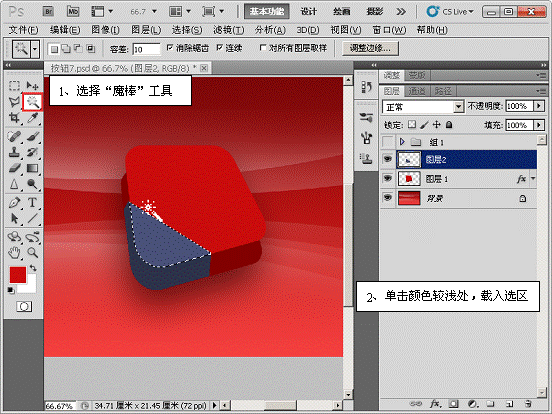
(9)使用“魔棒”工具载入选区。
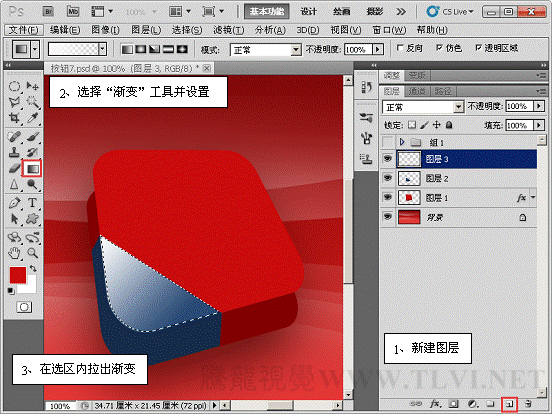
(10)新建“图层 3”,使用“渐变”工具拉出渐变。
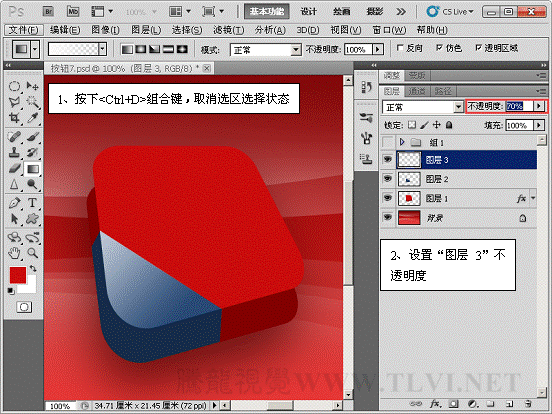
(11)取消选区选择状态,设置“图层 3”的不透明度为“70%”。
(12)设置前景色,使用“钢笔”工具进行绘制。

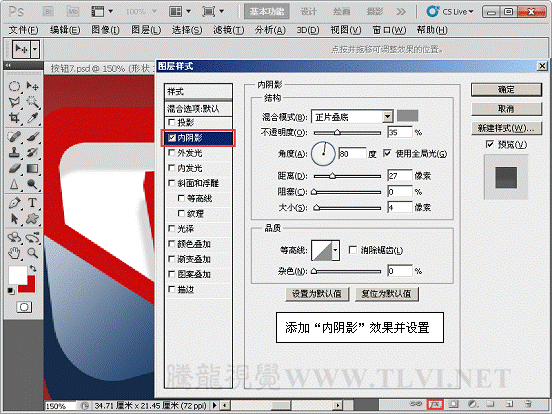
(13)为“形状 1”添加图层样式。


(14)使用“钢笔”工具进行绘制。

(8)执行“图像”→“调整”→“色相/饱和度”命令。
(9)使用“魔棒”工具载入选区。
(10)新建“图层 3”,使用“渐变”工具拉出渐变。
(11)取消选区选择状态,设置“图层 3”的不透明度为“70%”。
(12)设置前景色,使用“钢笔”工具进行绘制。
(13)为“形状 1”添加图层样式。
(14)使用“钢笔”工具进行绘制。


