
Step 19
如下图选择纹理,设置云状图案、缩放200%、模式为颜色加深、深度100%、其余默认。
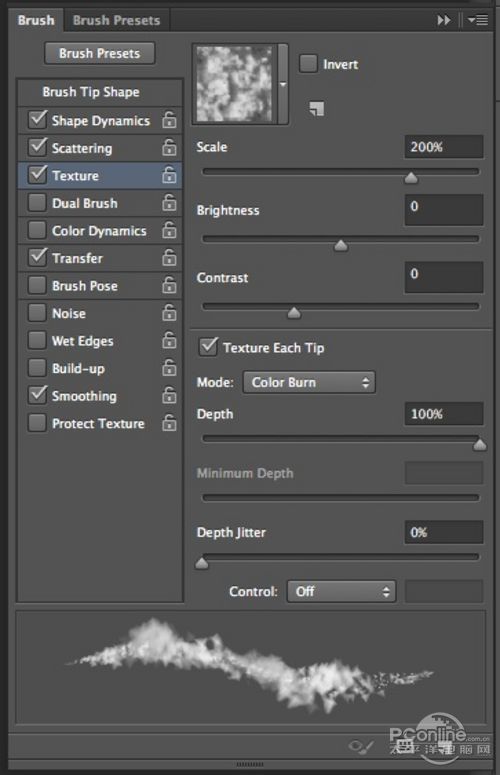
图19
Step 20
如下图选择其他动态,设置不透明度抖动100%、流量抖动46%、其余默认。
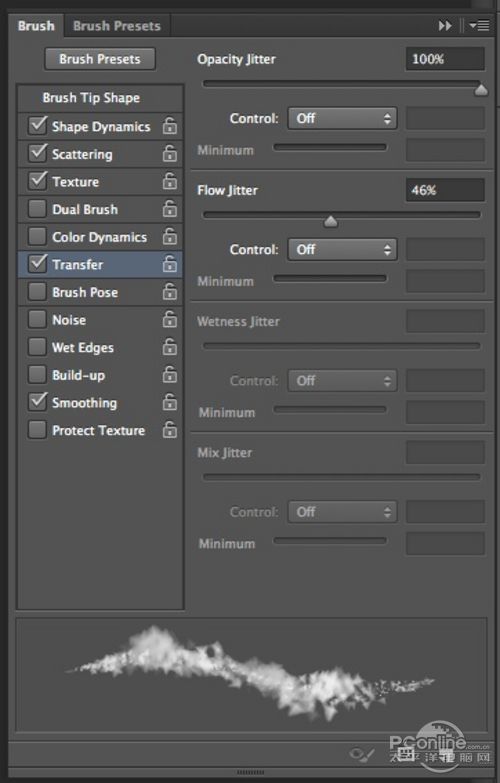
图20
Step 21
设置笔刷后,在图层控制面板最顶端新建一个图层。按B选择笔刷,笔刷类型选用刚才新建的笔刷,用灰色在画布上涂出下图的效果。

图21
Step 22
在刚才的新建的图层下面再新建一个图层,同样用刚才设置的笔刷,不过颜色改用红色。然后如下图涂刷。

图22
Step 23
与上面制作背景烟幕的步骤相同,这次是将灰色烟幕放在其他图层的上方。

图23
Step 24
添加一个新的图层在灰色烟幕的上方,然后按Shift+F5填充颜色#574f41,接着改变图层的混合模式为叠加。

图24
Step 25
在Google上截取部分地图,将地图导入Photoshop后,拉入主画布并放置在图层面板中除背景图层的下方。

图25


