
本文使用了多种PS制作技巧,先用滤镜制作出外层水效果,然后使用水的泼溅图片来贴图,结合爱心图片来完成整体的特效制作,最后就是色调转换变化。总之这是一篇很精彩的PS合成教程
最终效果

<点小图查看大图>
1、新建一个1024 * 768像素的文档,背景填充黑色。
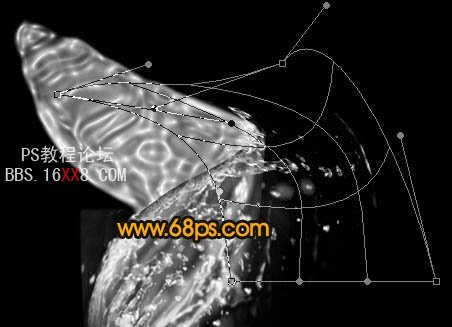
新建一个图层命名为“彩带1”,用钢笔工具勾出图1所示的路径,转为选区后填充白色,效果如图2 。
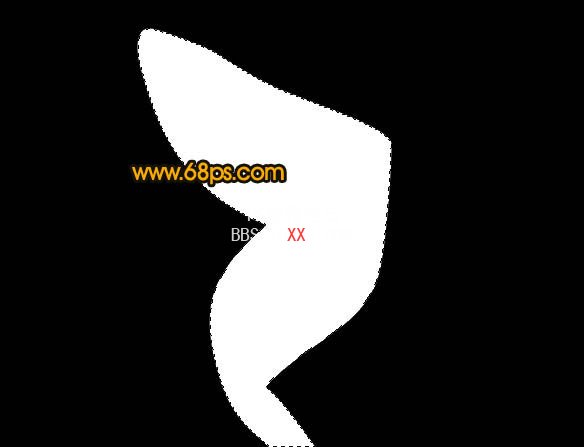
<图1>

<图2>
2、锁定图层后执行:滤镜 > 艺术效果 > 塑料包装,参数设置如图3,效果如图4。确定后按Ctrl + F加强效果,按9次左右,效果如图5。滤镜效果都是随机的,效果大致类似即可。

<图3>

<图4>
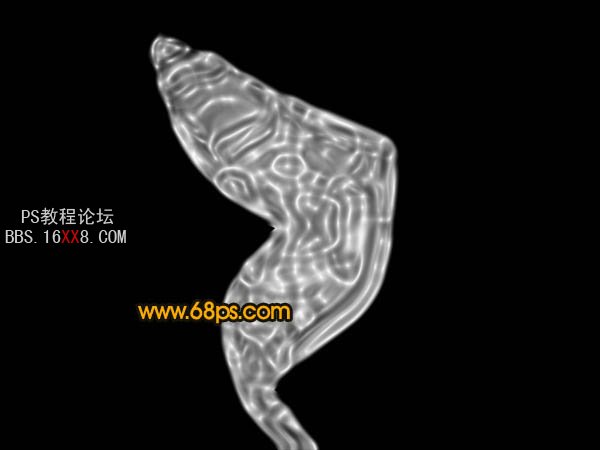
<图5>
2、锁定图层后执行:滤镜 > 艺术效果 > 塑料包装,参数设置如图3,效果如图4。确定后按Ctrl + F加强效果,按9次左右,效果如图5。滤镜效果都是随机的,效果大致类似即可。
<图3>
<图4>
<图5>
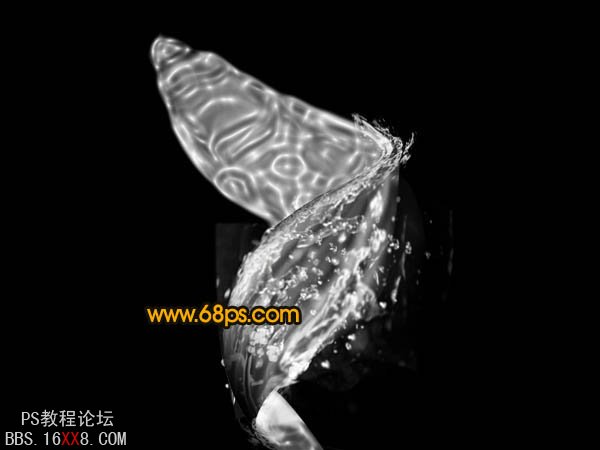
5、用钢笔勾出图9所示的选区,选择减淡,加深工具处理明暗,效果如图10。到这里彩带基本完成,部分暗角后面再慢慢完善。
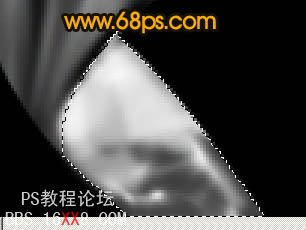
<图9>

<图10>
6、打开下图所示的水花素材,用套索工具截取部分水珠,然后复制,回到彩带文件,粘贴进来。图层混合模式改为“滤色”,适当调整角度和大小,按照彩带的流动方向排列,如图12。

<图11>
<图12>
7、再打开其他水珠素材,同上的方法复制进来,图层混合模式改为“滤色”,部分素材需要用变形工具调整角度,过程如图15 - 17。

<图13>

<图14>

<图15>

<图16>

<图17>
8、现在开始制作“彩带2”暗部,调出“彩带2”选择,在图层的最上面新建一个图层,把前景颜色设置为黑色。选择画笔工具,画笔不透明度设置为:10%左右,用画笔把底部及上边缘部分涂暗,效果如图19。

<图18>

<图19>
9、制作转角部分的水珠,在水珠素材截取图20所示的水珠,复制进来,按Ctrl + T 变形,右键选择变形,适当调整角度如图21,效果如图22。

<图20>
<图21>
<图22>
10、打开下图所示的心形素材,用魔术棒抠出来,拖进来放到“彩带2”图层的下面,效果如图24。

<图23>
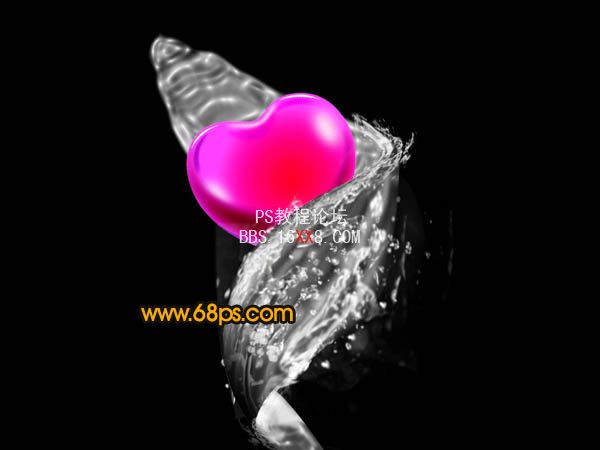
<图24>
11、回到“彩带1”图层,加上图层蒙版,用黑色画笔擦掉顶部部分,效果如下图。

<图25>
12、打开图26所示的素材,用套索截取部分水花,粘贴到“彩带1”图层上面,图层混合模式改为“滤色”,适当调整角度和大小,效果如图27,如果觉得水花亮度不够,可以把当前图层复制一层,适当调整一下不透明度。

<图26>

<图27>
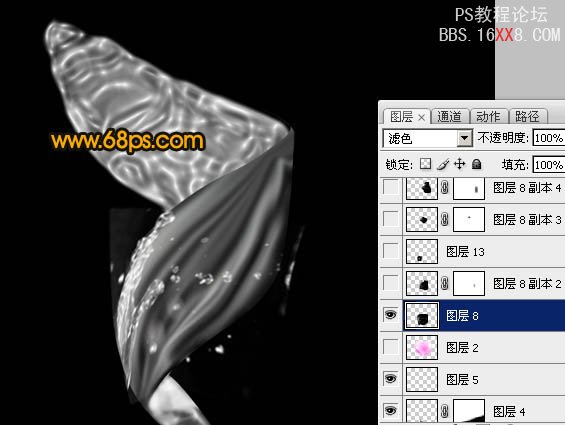
13、在图层的最上面创建渐变映射调整图层,颜色设置如图28,29,效果如图30。

<图28>

<图29>

<图30>
14、新建一个图层,按Ctrl + Alt + Shift + E 盖印图层。执行:滤镜 > 其它 > 自定,数值默认。确定后把图层不透明度改为:30%,加上图层蒙版,用黑色画笔把心形部分擦出来,效果如下图。

<图31>
15、最后调整下细节,完成最终效果。
<点小图查看大图>


