使用以下设置再添加一个阴影:
混合模式:正片叠底 不透明度:50% 角度:120 距离:63 大小:50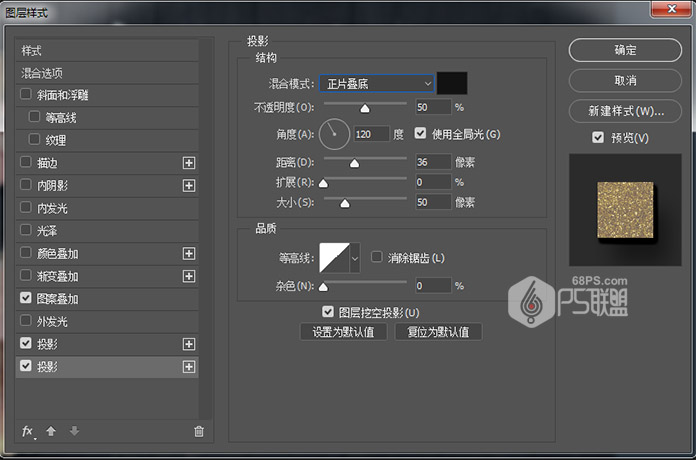 步骤43
步骤43
Ctrl+T把红色树叶缩小,放在你喜欢的位子,并复制添加红色树叶放在各个你需要的位子上。
 步骤44
步骤44
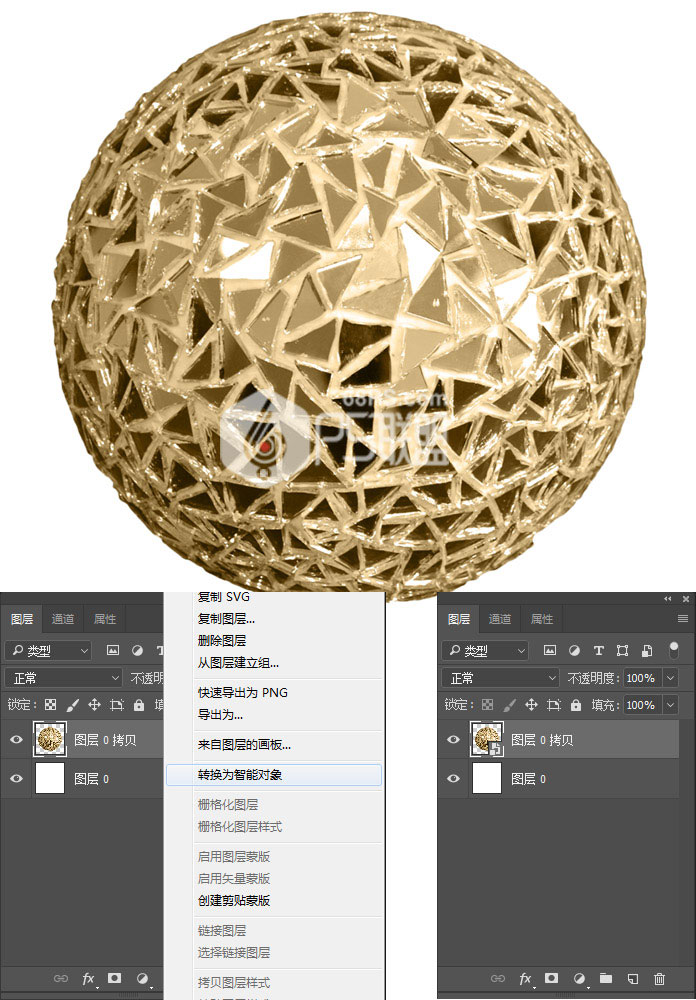
打开镜像球图像。
双击图层以使用以下设置应用颜色叠加:
颜色:#9896d39 混合模式:颜色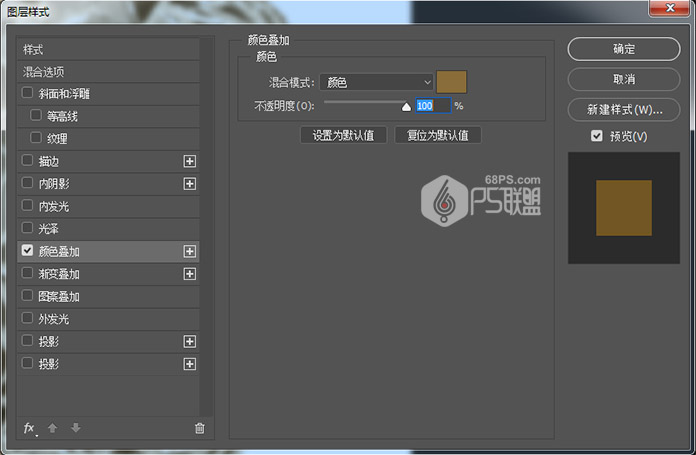 步骤45
步骤45
在图层上点击右键,在弹出的菜单中点转换为智能对象。
 步骤46
步骤46
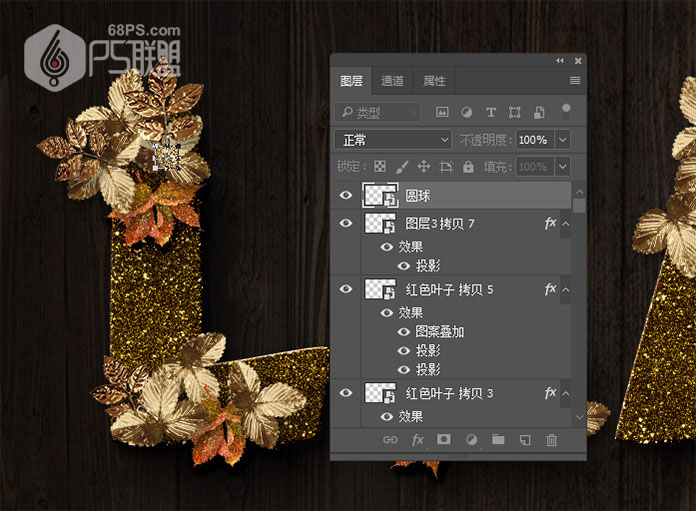
将球拉入文字图像中,Ctrl+T把球调整到合适的大小。转到图层,命名图层为圆球。
步骤47
双击图层打开图层样式
使用以下设置添加图案叠加:
混合模式:变亮 图案:金色闪光 比例:50% 不透明度:100%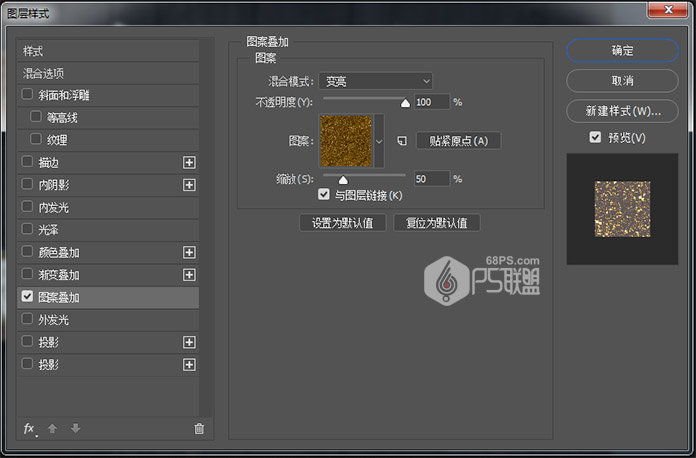
添加一个外发光与这些设置:
混合模式:柔光 不透明度:35% 颜色:#ffffff 大小:50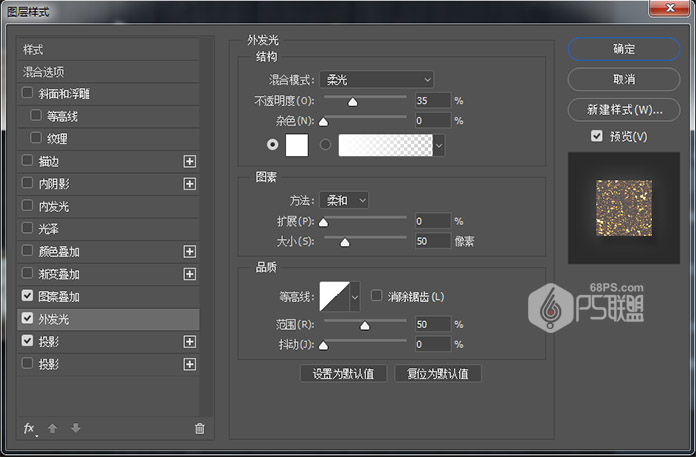
用这些设置添加阴影效果:
混合模式:正片叠底 不透明度:32% 距离:12 大小:9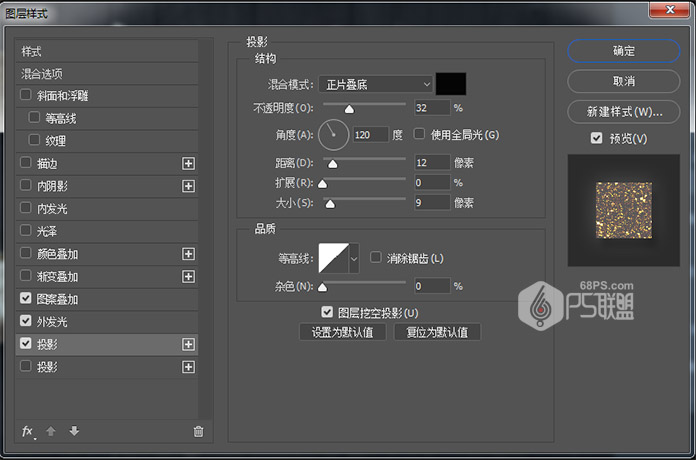 步骤48
步骤48
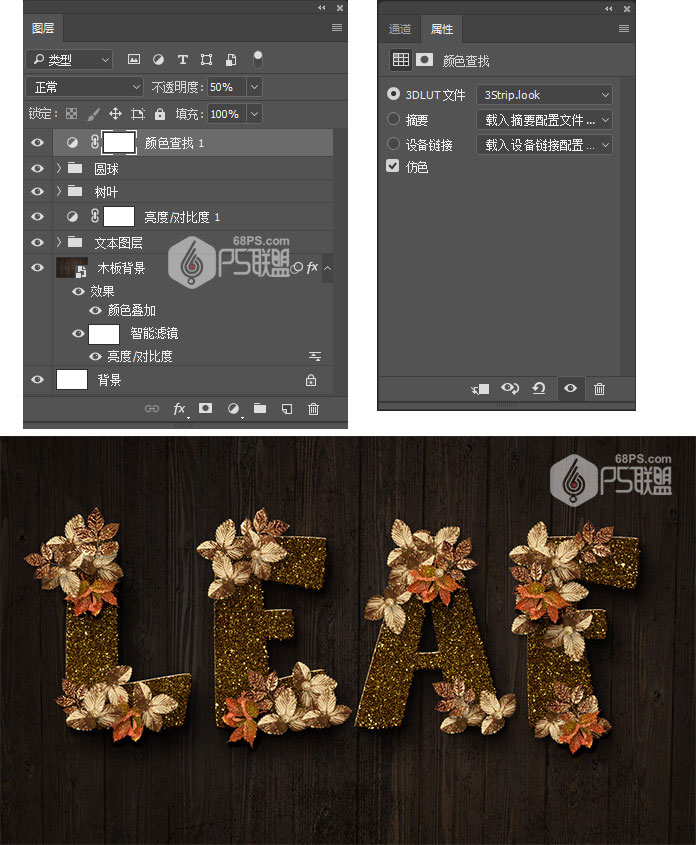
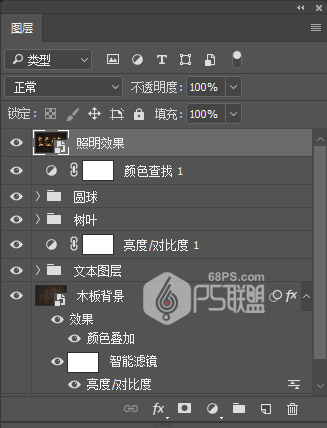
复制添加更多的圆球,并将它们移动到合适的位子上。把所有的圆球图层选中添加到组中,并把组命名为圆球。
 步骤49 下面我们给整个画面进行灯光调整
转到图层点击创建新的填充或调整图层中的颜色查找,并从3DLUT文件菜单中选择3Strip.look表,并将图层的不透明度更改为50%。
步骤50
按下Shift+Ctrl+Alt+E键在所有图层上创建一个盖章图层。将图层重命名为照明效果并将其转换为智能对象。
 步骤51
步骤51
转到滤镜>渲染>光照效果。选择聚光灯,并调整相关的参数,设置如下图
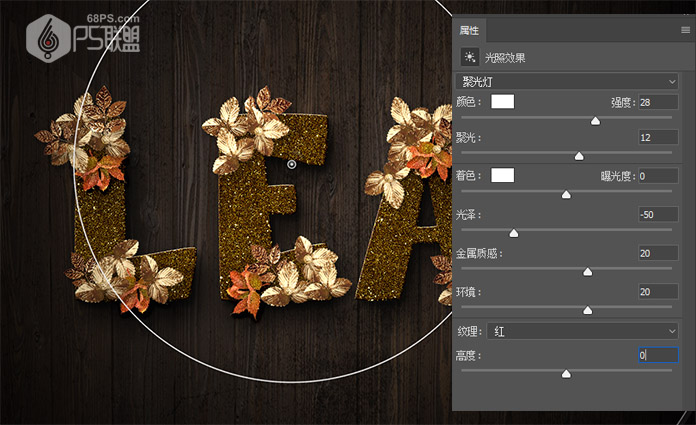 步骤52
步骤52
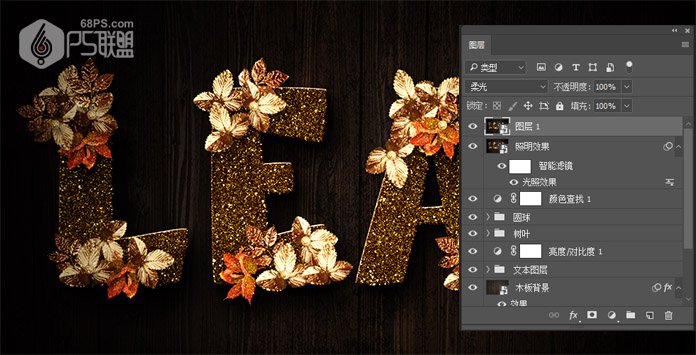
在所有图层上创建另一个盖章图层,将其命名为高光,将其转换为智能对象,并将其混合模式更改为柔光。
 步骤53
步骤53
转到滤镜>其它>高反差保留,并设置半径为1。
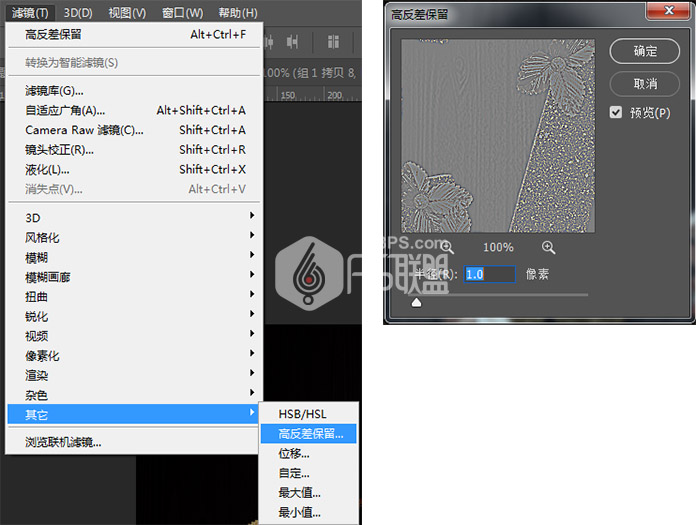 步骤54
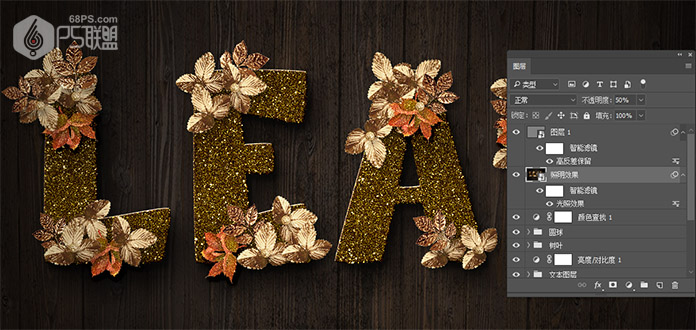
步骤54
将照明效果图层的不透明度更改为50%。
在本教程中,我们使用了图层样式来创建一些闪烁的文字。然后,我们使用图层样式和过滤镜来创建金色的叶子,并在文本上添加更多红色叶子以使文字效果更好看。
好了,完工了,我们一起来看下完成后的效果吧!