二十.图像—旋转画布—“90度(逆时针)”,然后滤镜—扭曲—“极坐标”,选择“平面坐标到极坐标”。把图片调整回来。![按此在新窗口浏览图片](https://img.lvups.com/d/file/bigpic/2022/12/25/n1q0zqh3i00.jpg)
![按此在新窗口浏览图片](https://img.lvups.com/d/file/bigpic/2022/12/25/lwsk211ia4u.jpg)
![按此在新窗口浏览图片](https://img.lvups.com/d/file/bigpic/2022/12/25/vdatlhbttxl.jpg)
![按此在新窗口浏览图片](https://img.lvups.com/d/file/bigpic/2022/12/25/ayydj1cyfyc.jpg)
![按此在新窗口浏览图片](https://img.lvups.com/d/file/bigpic/2022/12/25/lag1judzjas.jpg)
![按此在新窗口浏览图片](https://img.lvups.com/d/file/bigpic/2022/12/25/n1q0zqh3i00.jpg)
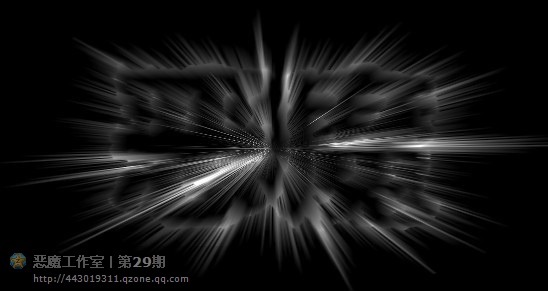
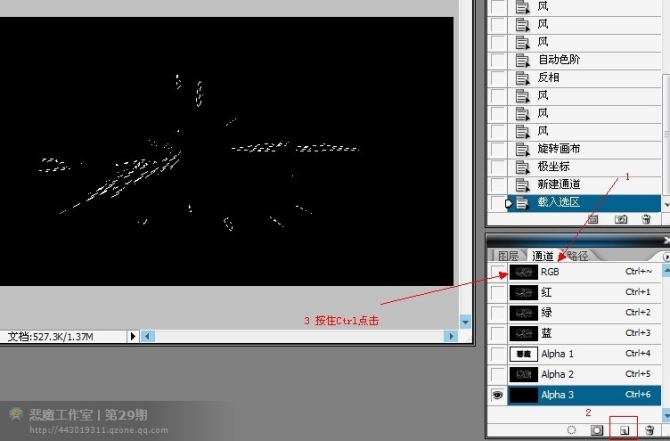
二十一.回到“通道”面板,“创建新通道”,按住Ctrl点击RGB图层“载入选区”。
![按此在新窗口浏览图片](https://img.lvups.com/d/file/bigpic/2022/12/25/lwsk211ia4u.jpg)
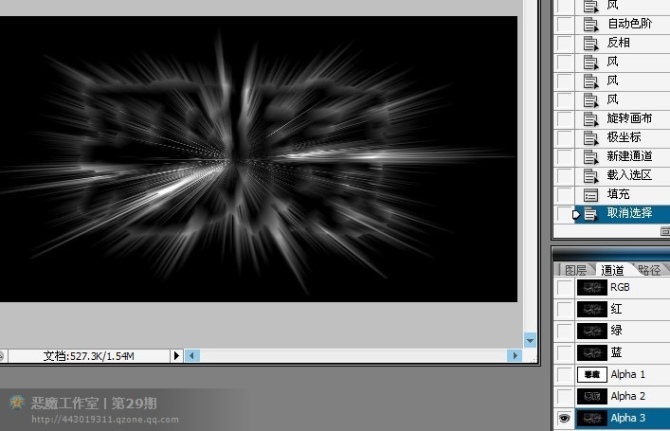
二十二.按Alt+Delete “填充前景色”,再按Ctrl+D “取消选区”。
![按此在新窗口浏览图片](https://img.lvups.com/d/file/bigpic/2022/12/25/vdatlhbttxl.jpg)
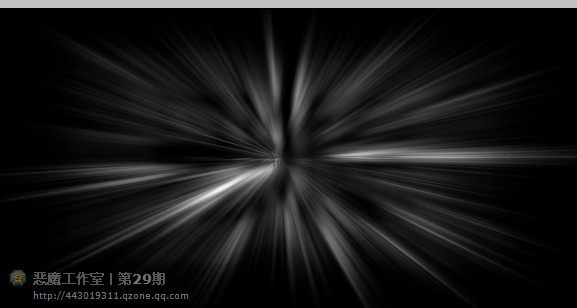
二十三.滤镜—模糊—“径向模糊”,数量调到100,其他项不变,确定。爆炸效果出来了,如下:
![按此在新窗口浏览图片](https://img.lvups.com/d/file/bigpic/2022/12/25/ayydj1cyfyc.jpg)
二十四.图像—调整—“色相/饱和度”,选择“着色”,调整数值和效果如下。
![按此在新窗口浏览图片](https://img.lvups.com/d/file/bigpic/2022/12/25/lag1judzjas.jpg)
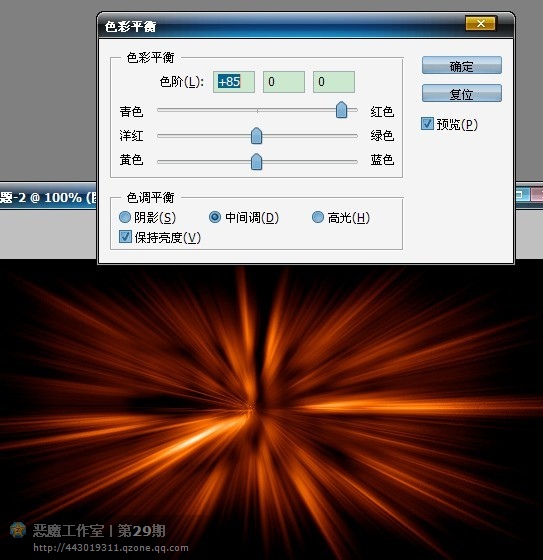
二十五.图像—调整—“色彩平衡”,只需调整中间调中的红色即可。
![按此在新窗口浏览图片](https://img.lvups.com/d/file/bigpic/2022/12/25/1sjcpkram5w.jpg)